
The ultimate guide to the OVER Mapper
2023-12-13
Best practices, tips and tricks to creating top notch 3D maps and maximizing your earning potential as we Map the World in 3D.
The Mapper tool is a major feature of the OVER app which uses the camera in your smartphone or tablet to capture multiple images from physical locations. State-of-the-art AI algorithms then piece all of the images together to create a 3D map of the location. This is a digital asset known as an OVER Map.
The OVER Map enables the precise placement of digital assets in the physical world for the creation of augmented reality experiences and an explorable digital twin of the location.
Making OVER Maps can earn you big rewards as part of our global map2earn™️ challenge. So to help you have the best possible chance to win $OVR tokens, we’ve put together the following guide to creating high quality OVER Maps…
Getting started – the OVER Mapper interface
The OVER Mapper interface has been designed to guide you through the steps needed to generate an OVER Map. It includes several indicators that help you produce a high-quality OVER Map.
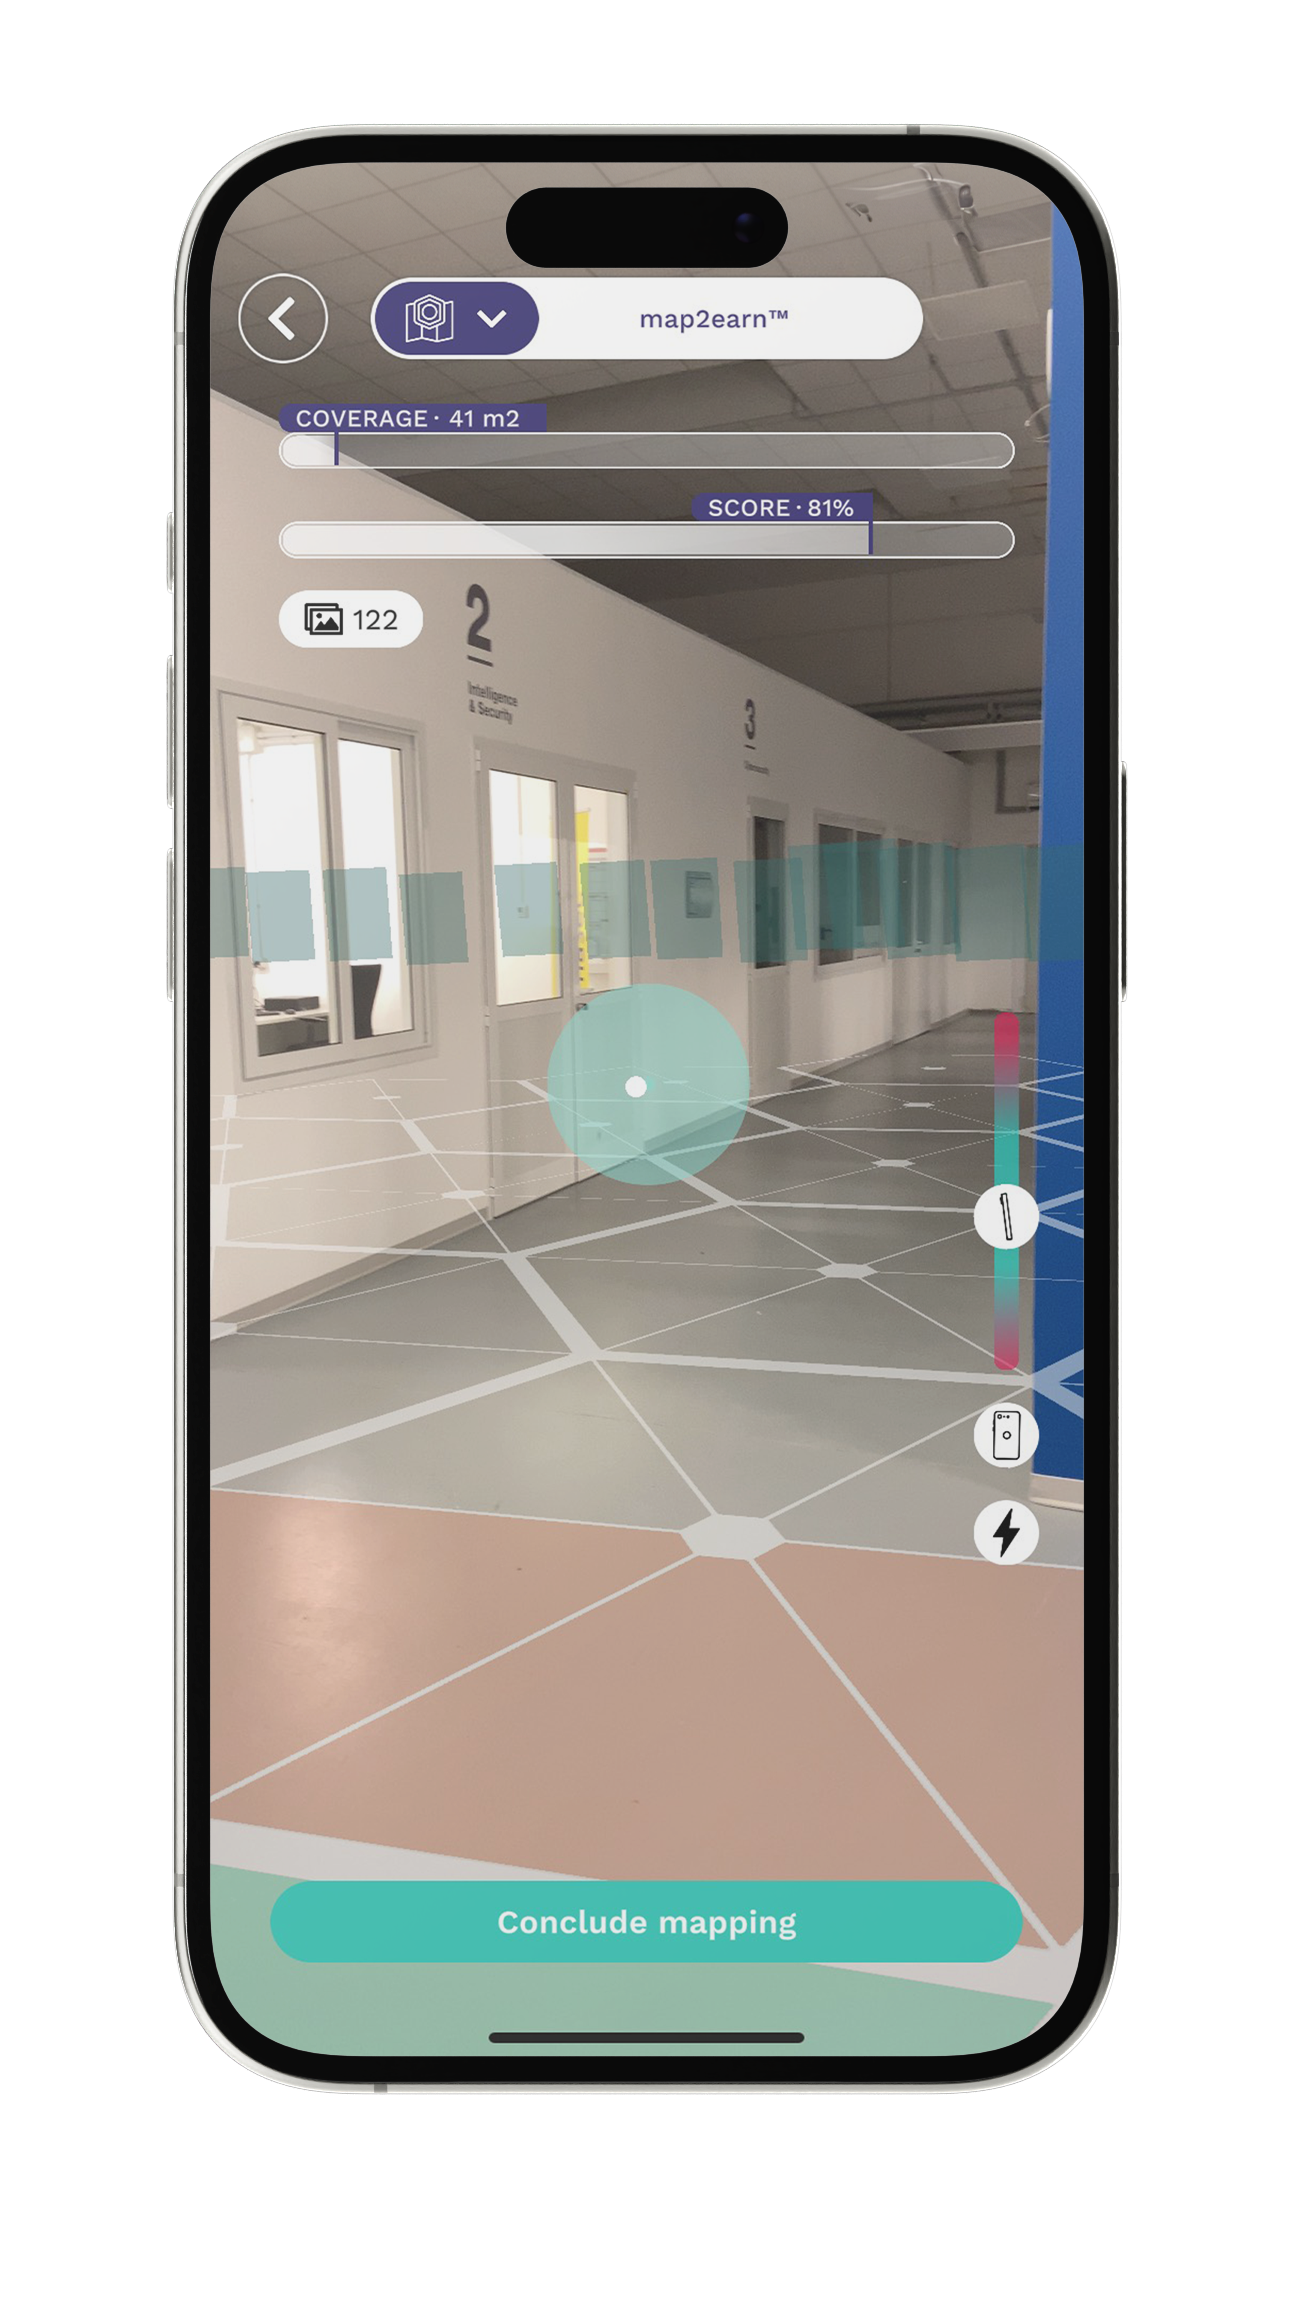
IMAGE: An interior location with hexagons layered over the floor. These hexagons are filled as sections of the location are captured by the Mapper.
Interface features
Points of view (POV): This is the framework of hexagons (shown in the image above) that is layered over the floor or ground. Walking around each hexagon shape fills the internal triangles, indicating another section of the location captured.
Coverage: Indicates how many square meters have been covered during the mapping process.
Score: Indicates the amount of POVs captured in the location.
Picture counter: This indicates the number of pictures captured during mapping. These aren’t saved to your device, they are captured to the OVER system. The minimum number of pictures you should capture is 300.
Vertical inclination indicator: This helps you to keep the camera at a level that optimizes your mapping. Your device will vibrate if there is excessive downward or upward tilting.
Portrait mode indicator: The device needs to stay in portrait mode during the mapping process. This indicator helps you keep it correctly oriented.
Viewfinder: Motion blur significantly degrades the quality of the map. To avoid motion blur, we introduced a viewfinder with a central dot that helps you understand if you’re moving too fast. Position the central dot inside the viewfinder to avoid motion blur. Your device will vibrate with each picture capture, but a strong vibration will indicate that you’re moving too fast.
The Mapping Process
There are 3 main phases in the mapping process:
- Localization: Go to the location you want to map, and if needed, adjust your position
- Panoramic: Capture the panoramic of the area you intend to map
- Additional Points of View (POV): Capture additional points of view (individual hexagons in the framework layer) of the location
1. Localization
Open the OVER App and click the Mapper button
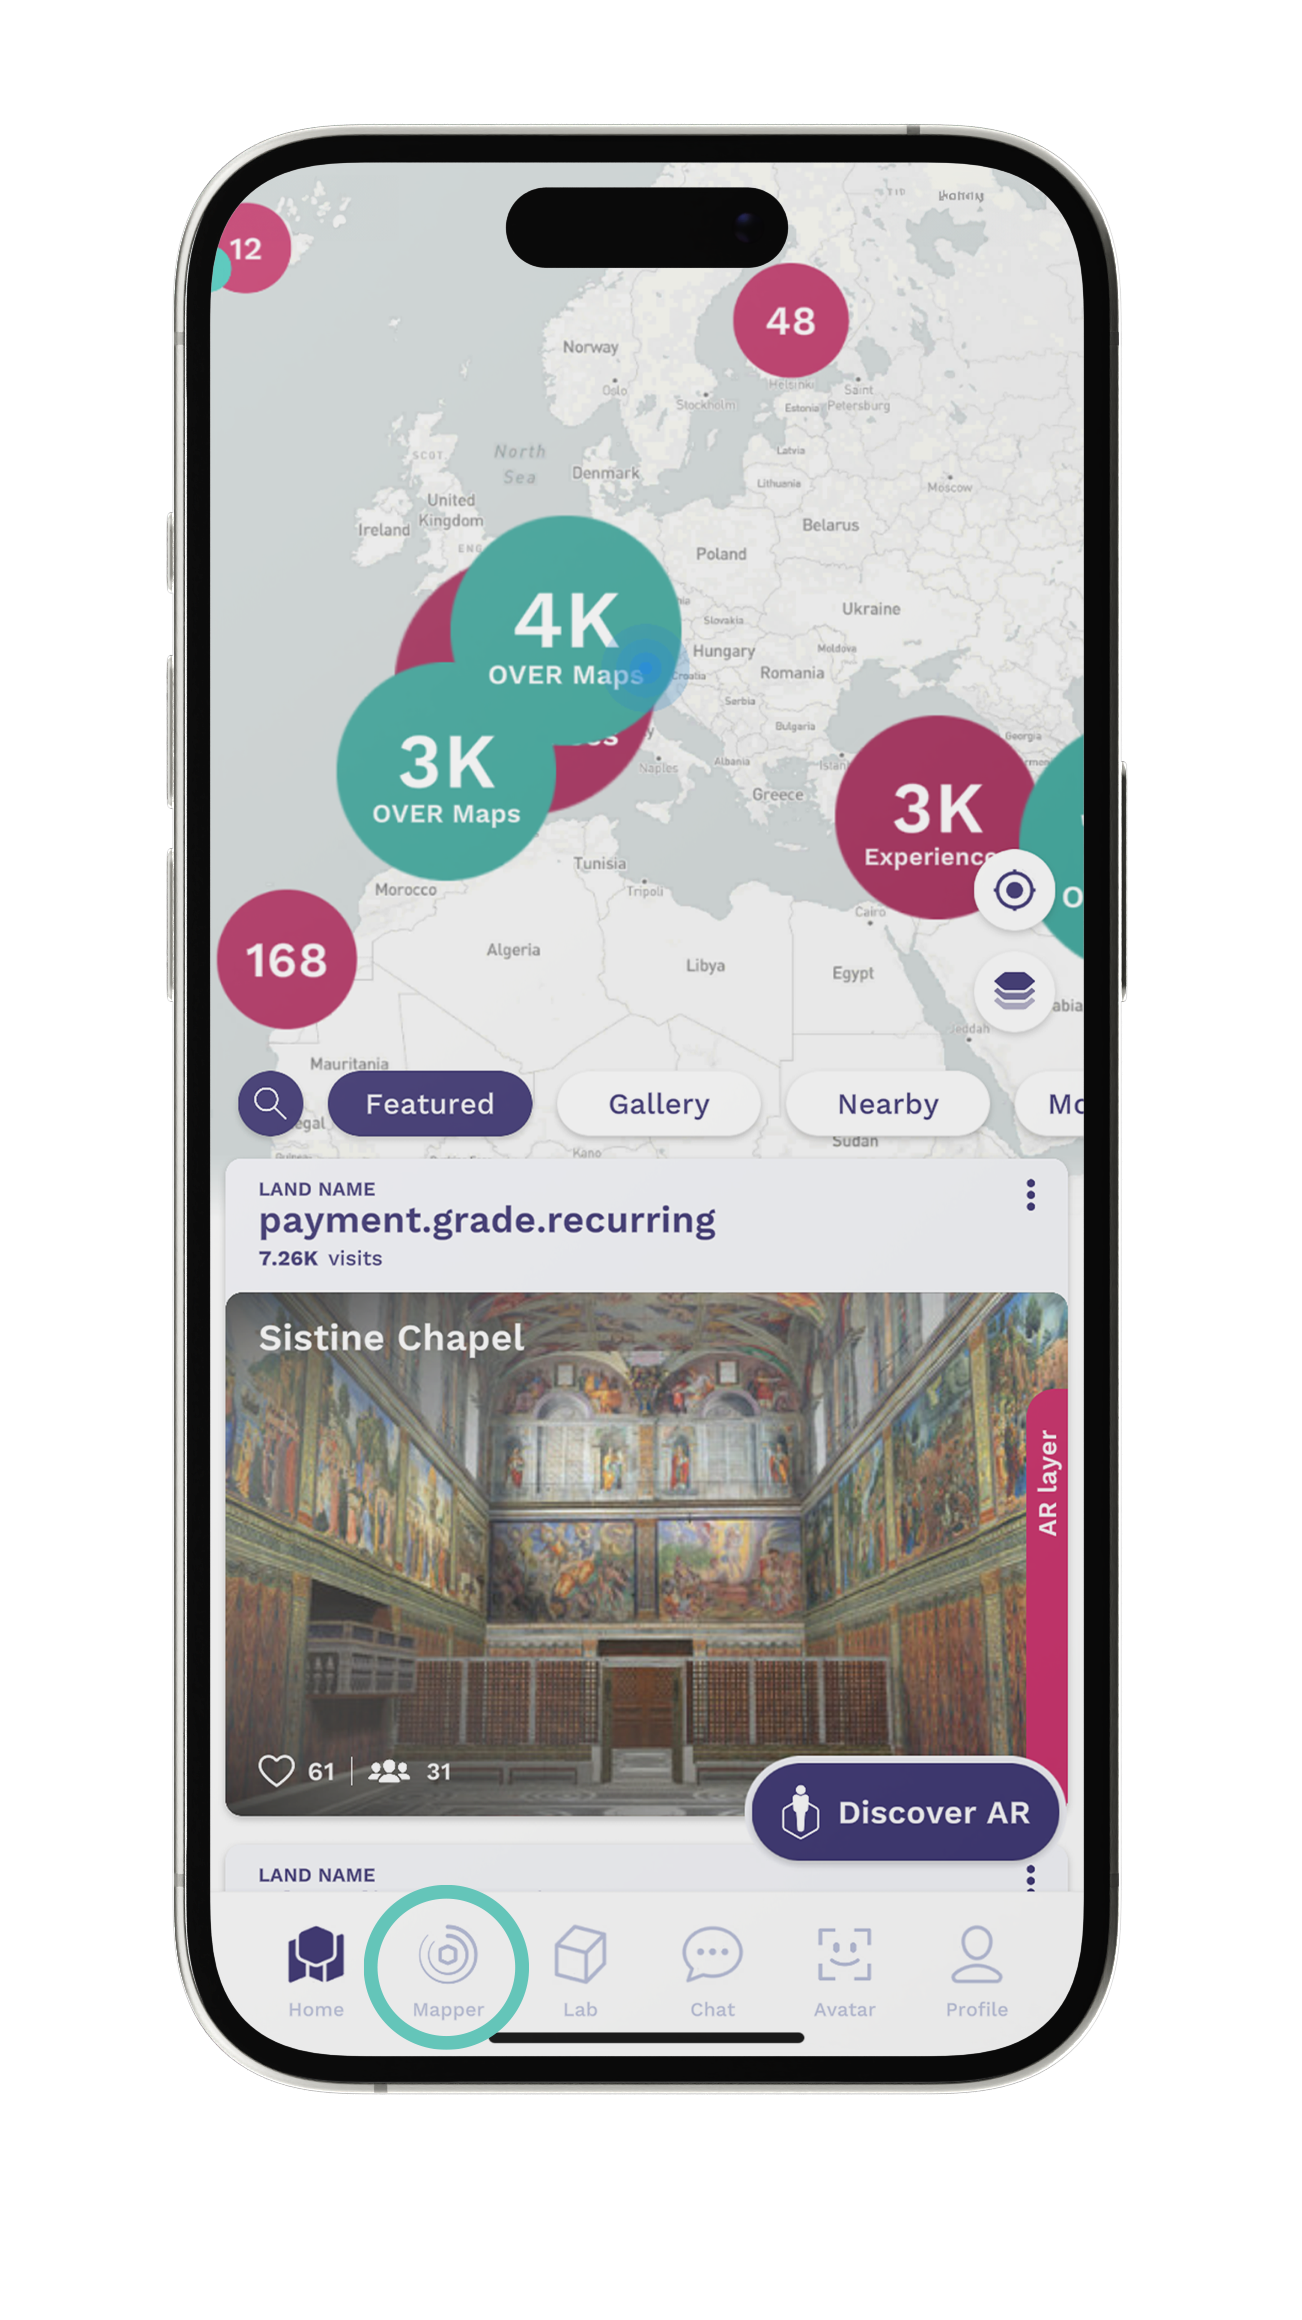
If you want to participate in the map2earn™️ rewards program:
- Toggle the map2earn™️ button at the top screen
- Search for OVER Lands around you that have incentives
- Go to the chosen location
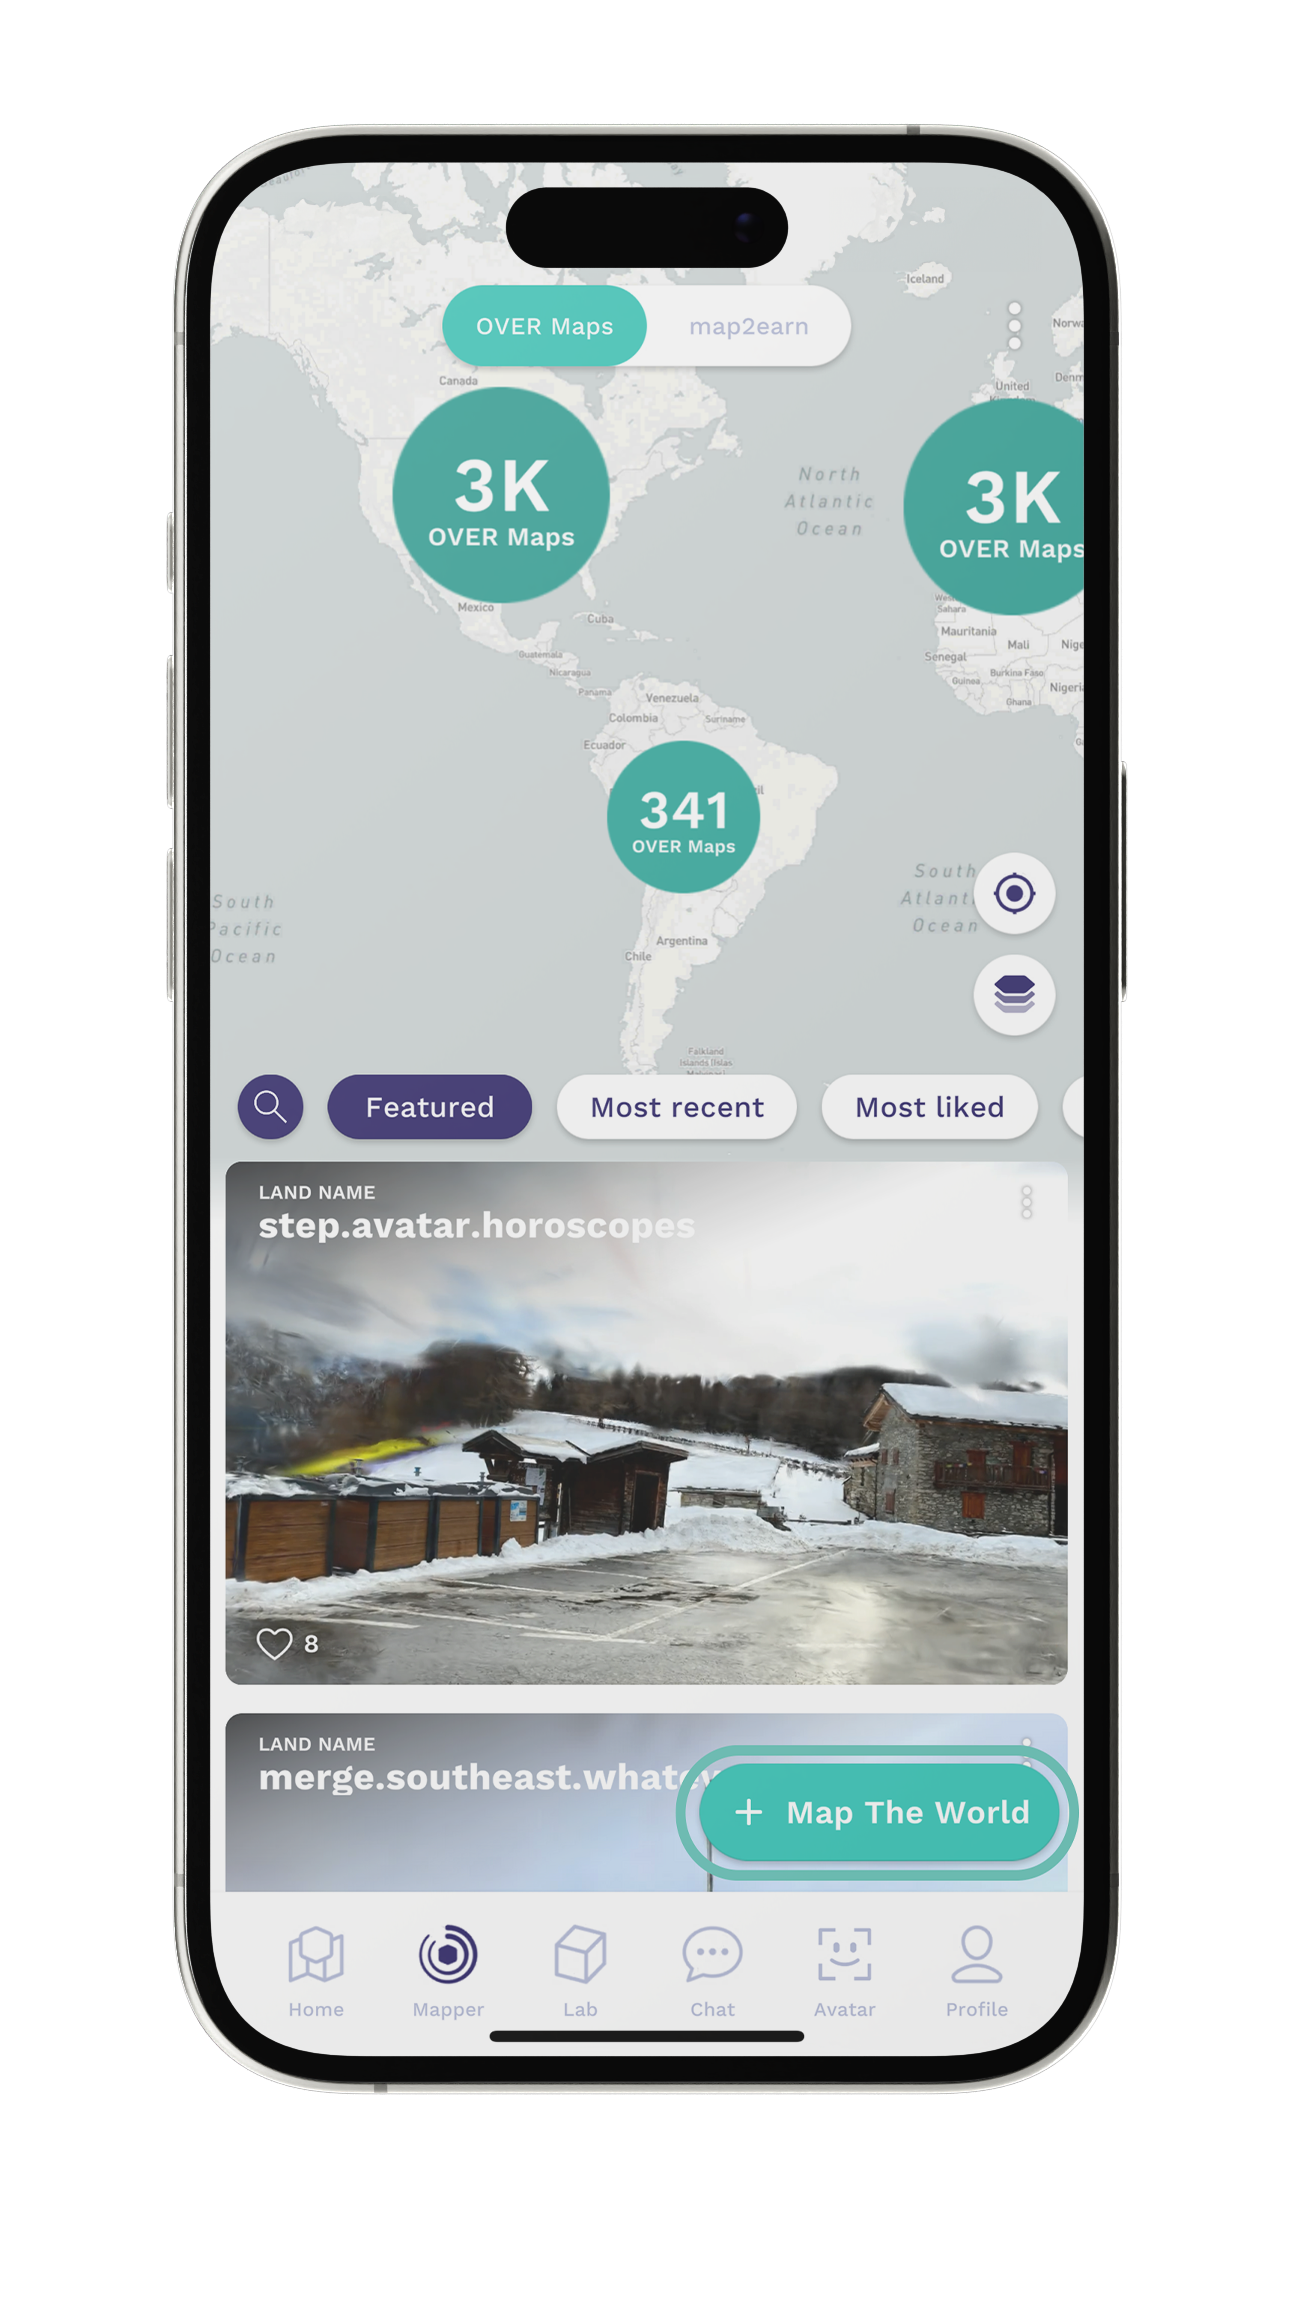
- Click the Map The World button
If you just want to make OVER Maps without taking part in the rewards program, stay in the OVER Maps section and simply click the Map The World button.
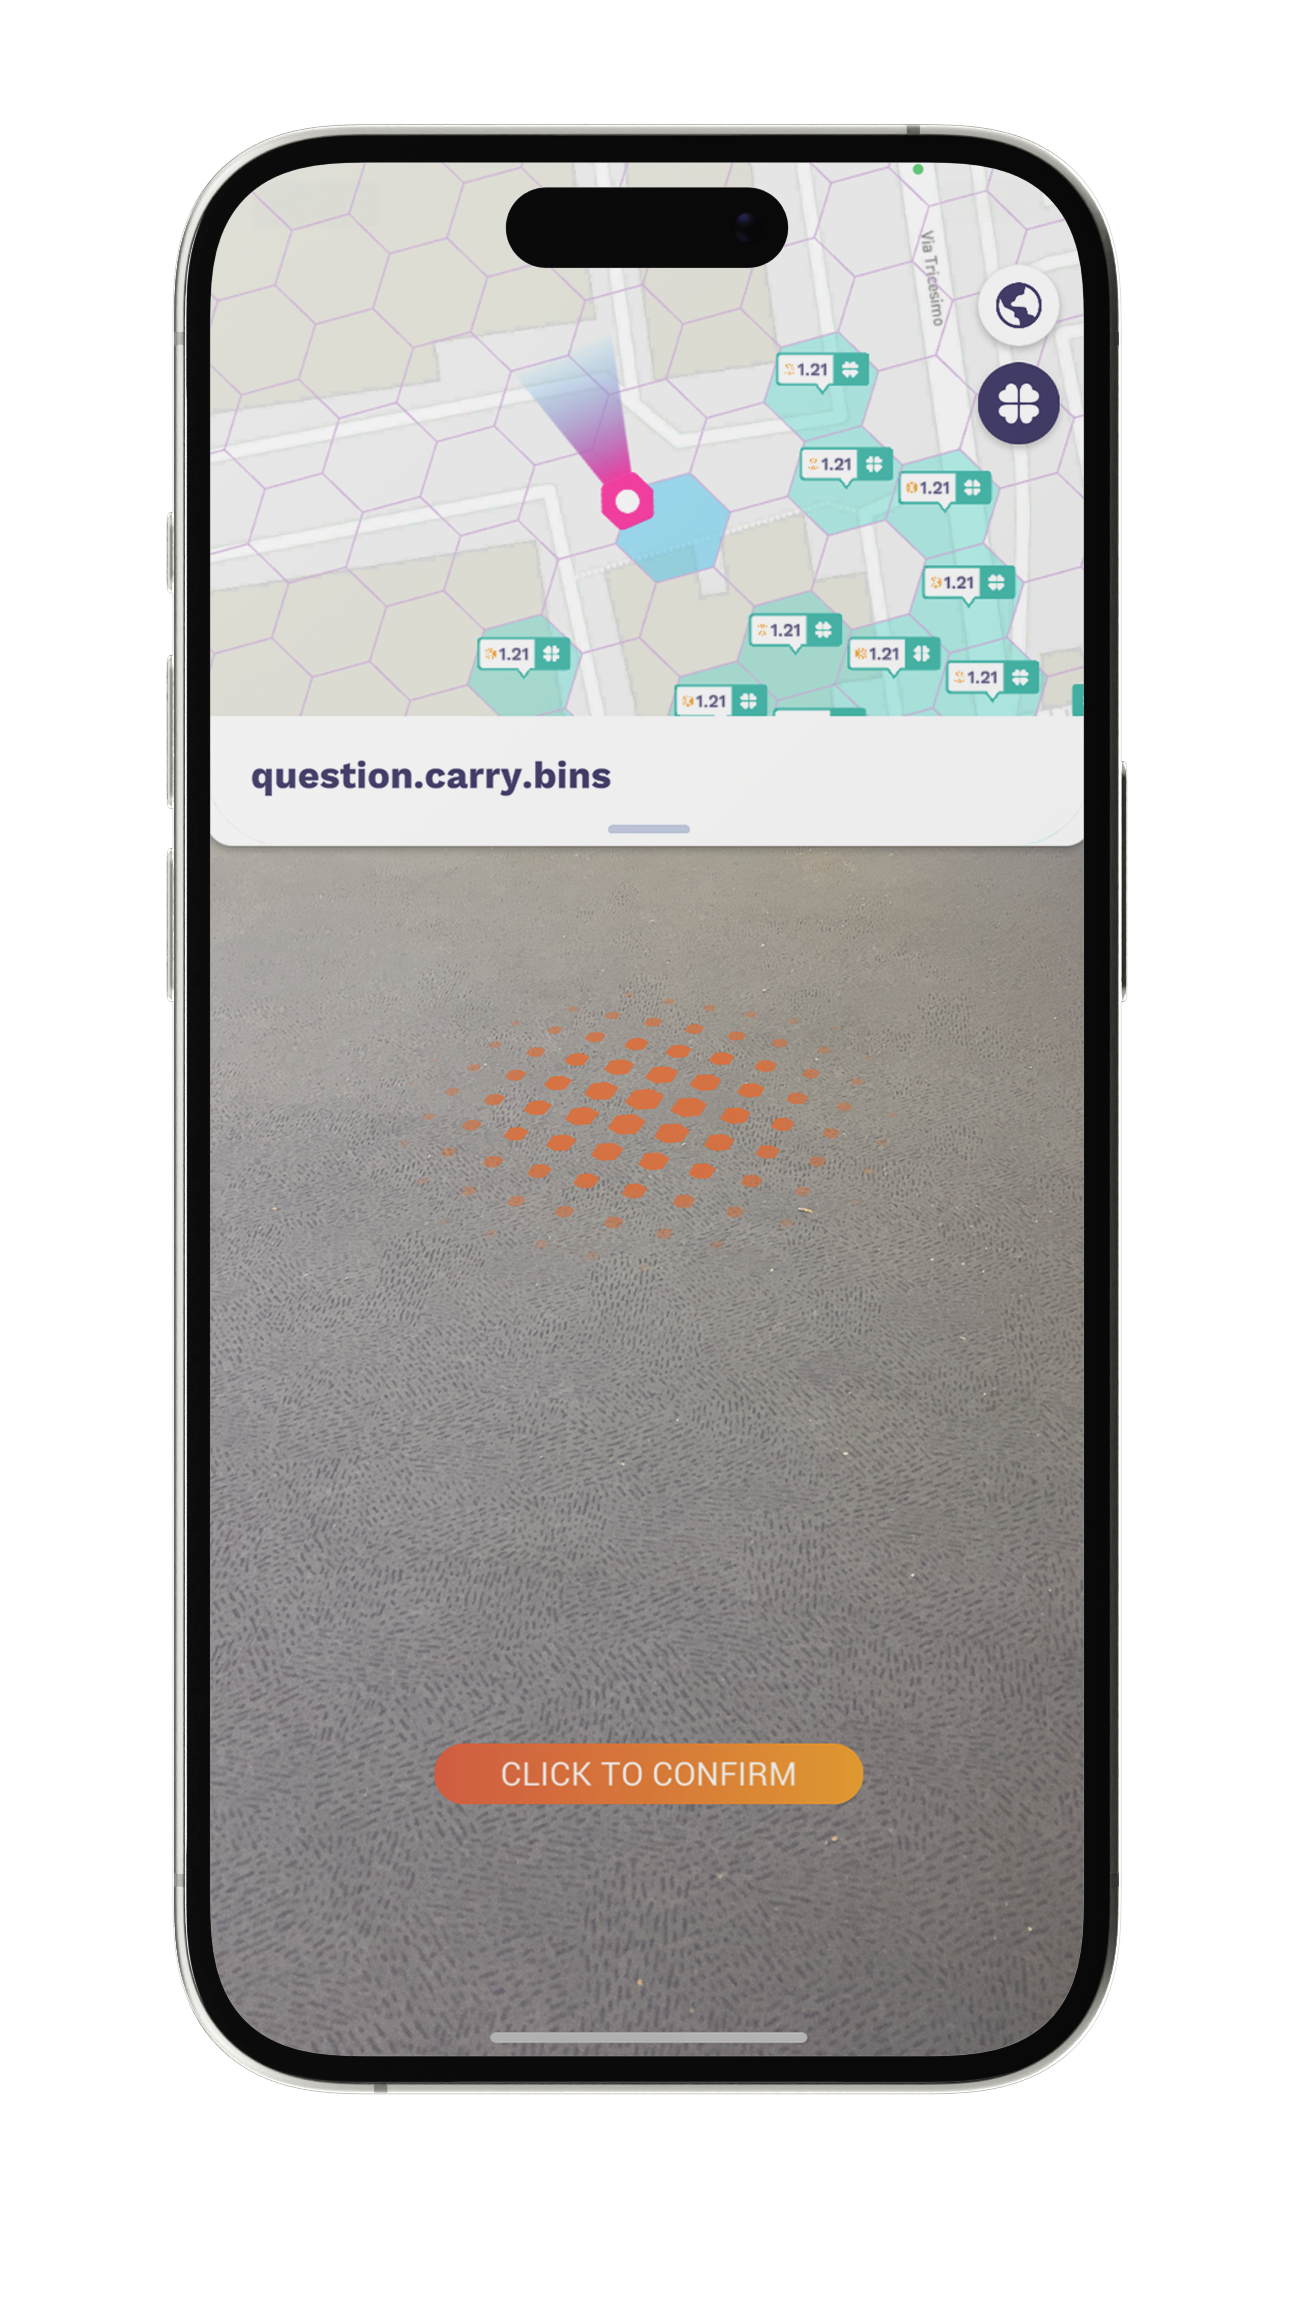
With your camera activated, point the device at the ground or floor to establish the surface and CLICK TO CONFIRM once the cluster of dots changes to orange.
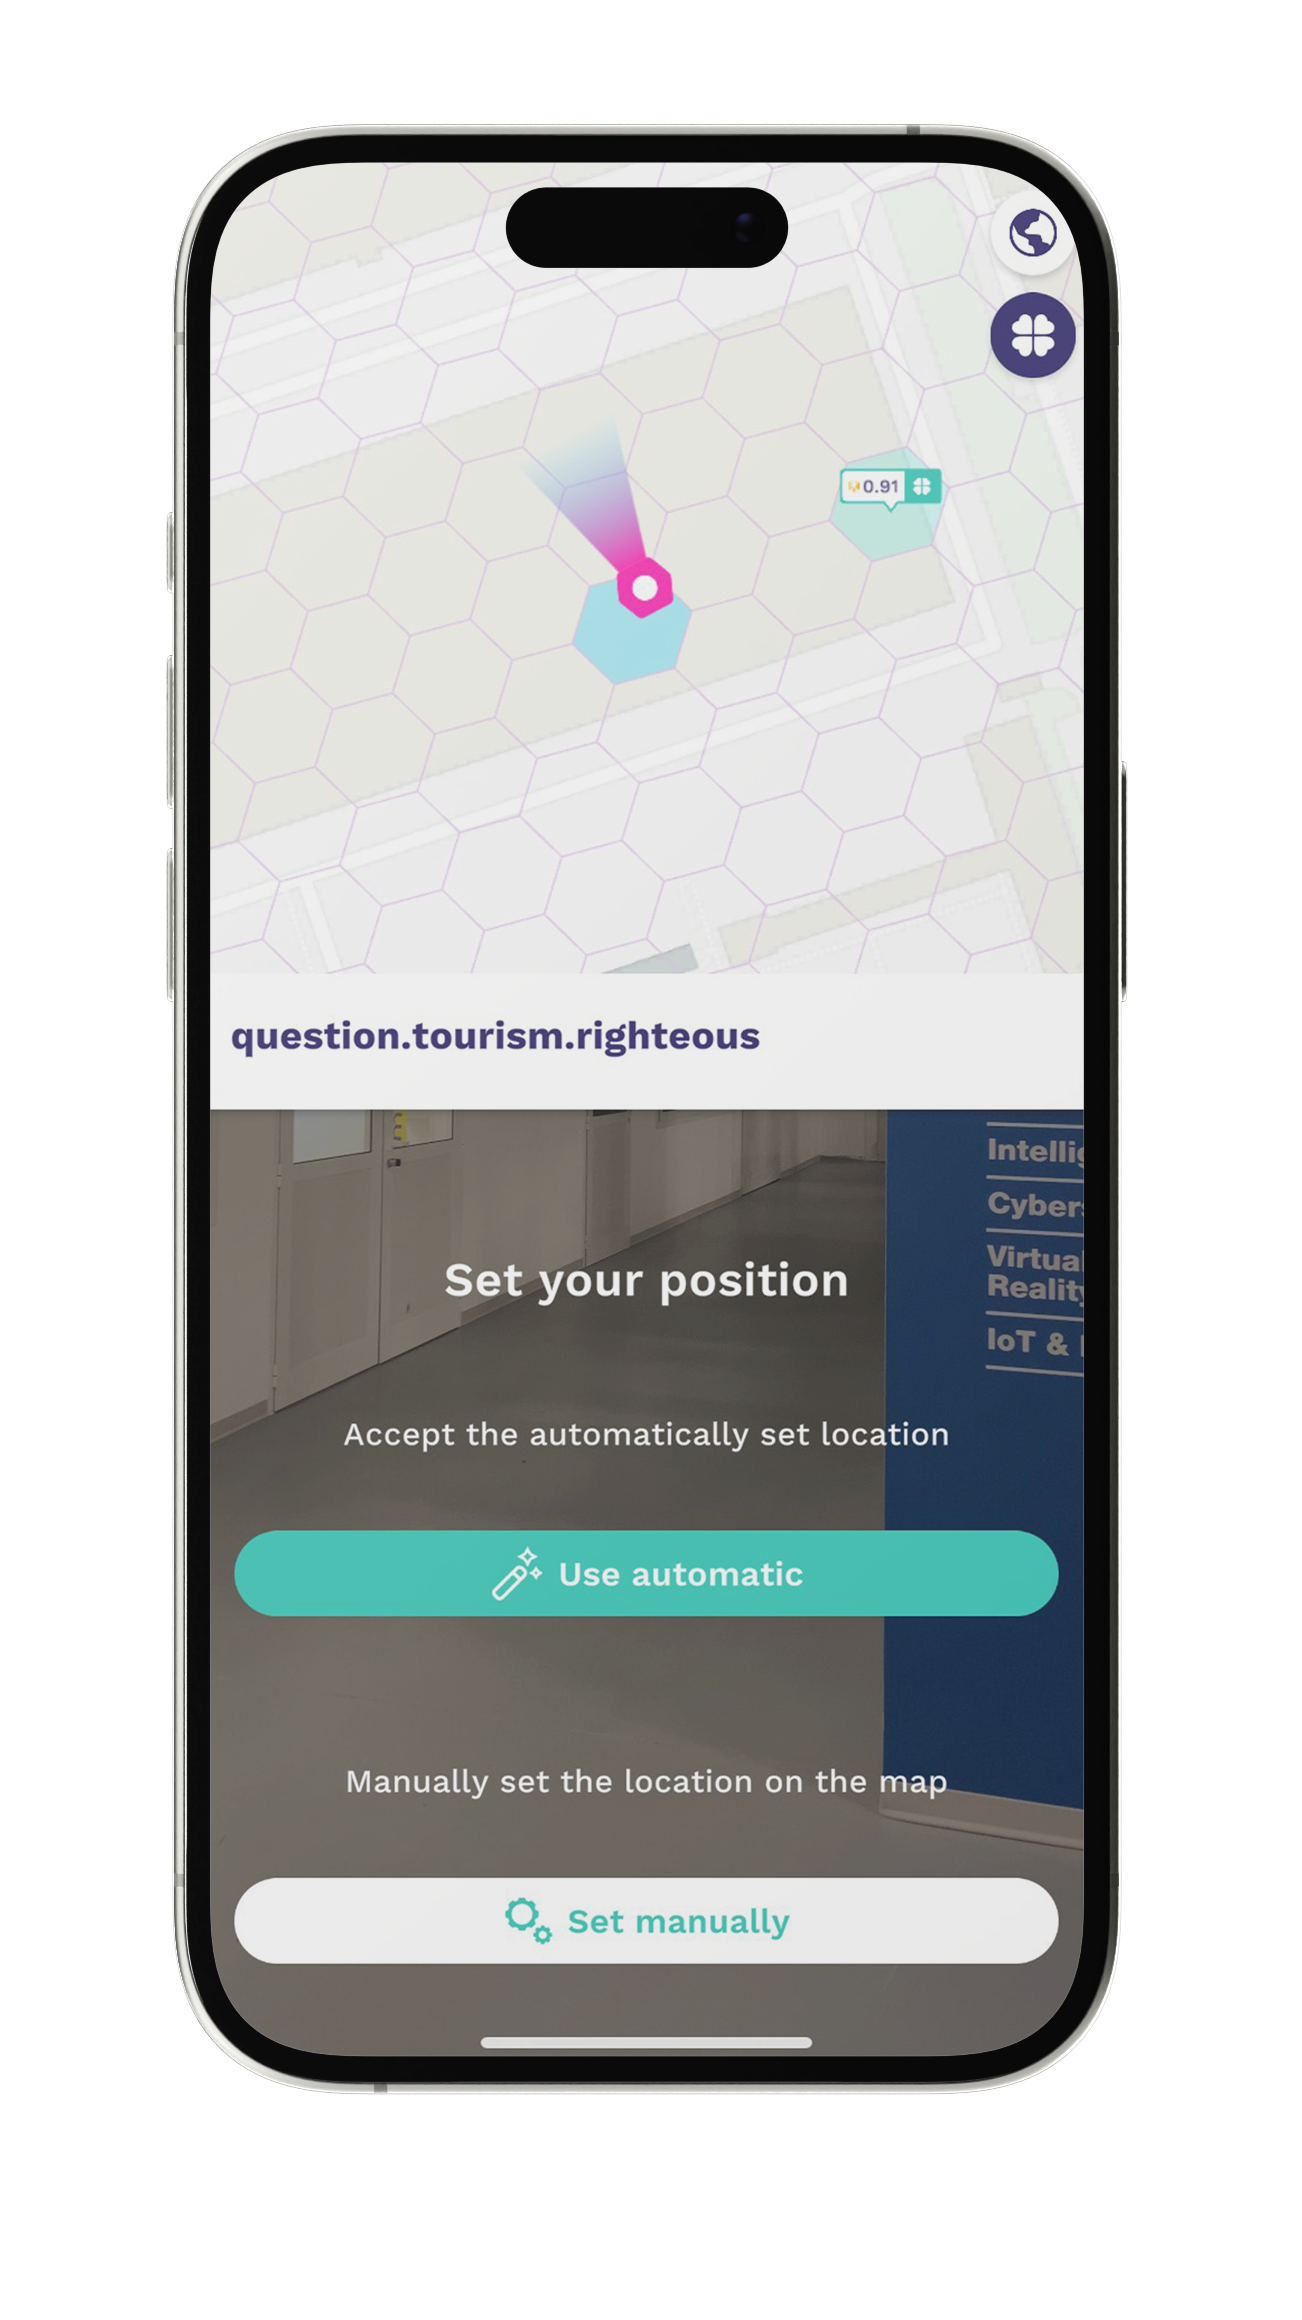
If the position suggested by GPS is correct, press ‘Use automatic’. If you can improve the accuracy, select ‘Set manually’. GPS might not be accurate indoors so the OVER Team will check the validity of declared locations.
You’re ready to start mapping!
2. Panoramic
The first part of the mapping process is taking a panoramic capture of the location. This is crucial to creating an approved, high quality OVER Map. To support you with this, we introduced an AR pyramid which appears at the start of the mapping process.
You position the AR pyramid in the center of the area you want to map. It is used as a visual reference for the center of your map.
Where possible, position yourself at the border of the mapping area and move around the pyramid, pointing your device’s camera at the shape.
Walls, obstacles, or closed areas in general may prevent you from capturing the whole pyramid from the correct distance. Therefore, try to capture as much of the pyramid as you can.
Generally, try to avoid placing the pyramid in a location where you cannot complete a 360 capture.


3. Additional Points of View
Once you complete the 360 capture, the pyramid will disappear, and the OVER Mapper will place the POV framework of hexagons, divided into triangle slices, on the ground or floor.

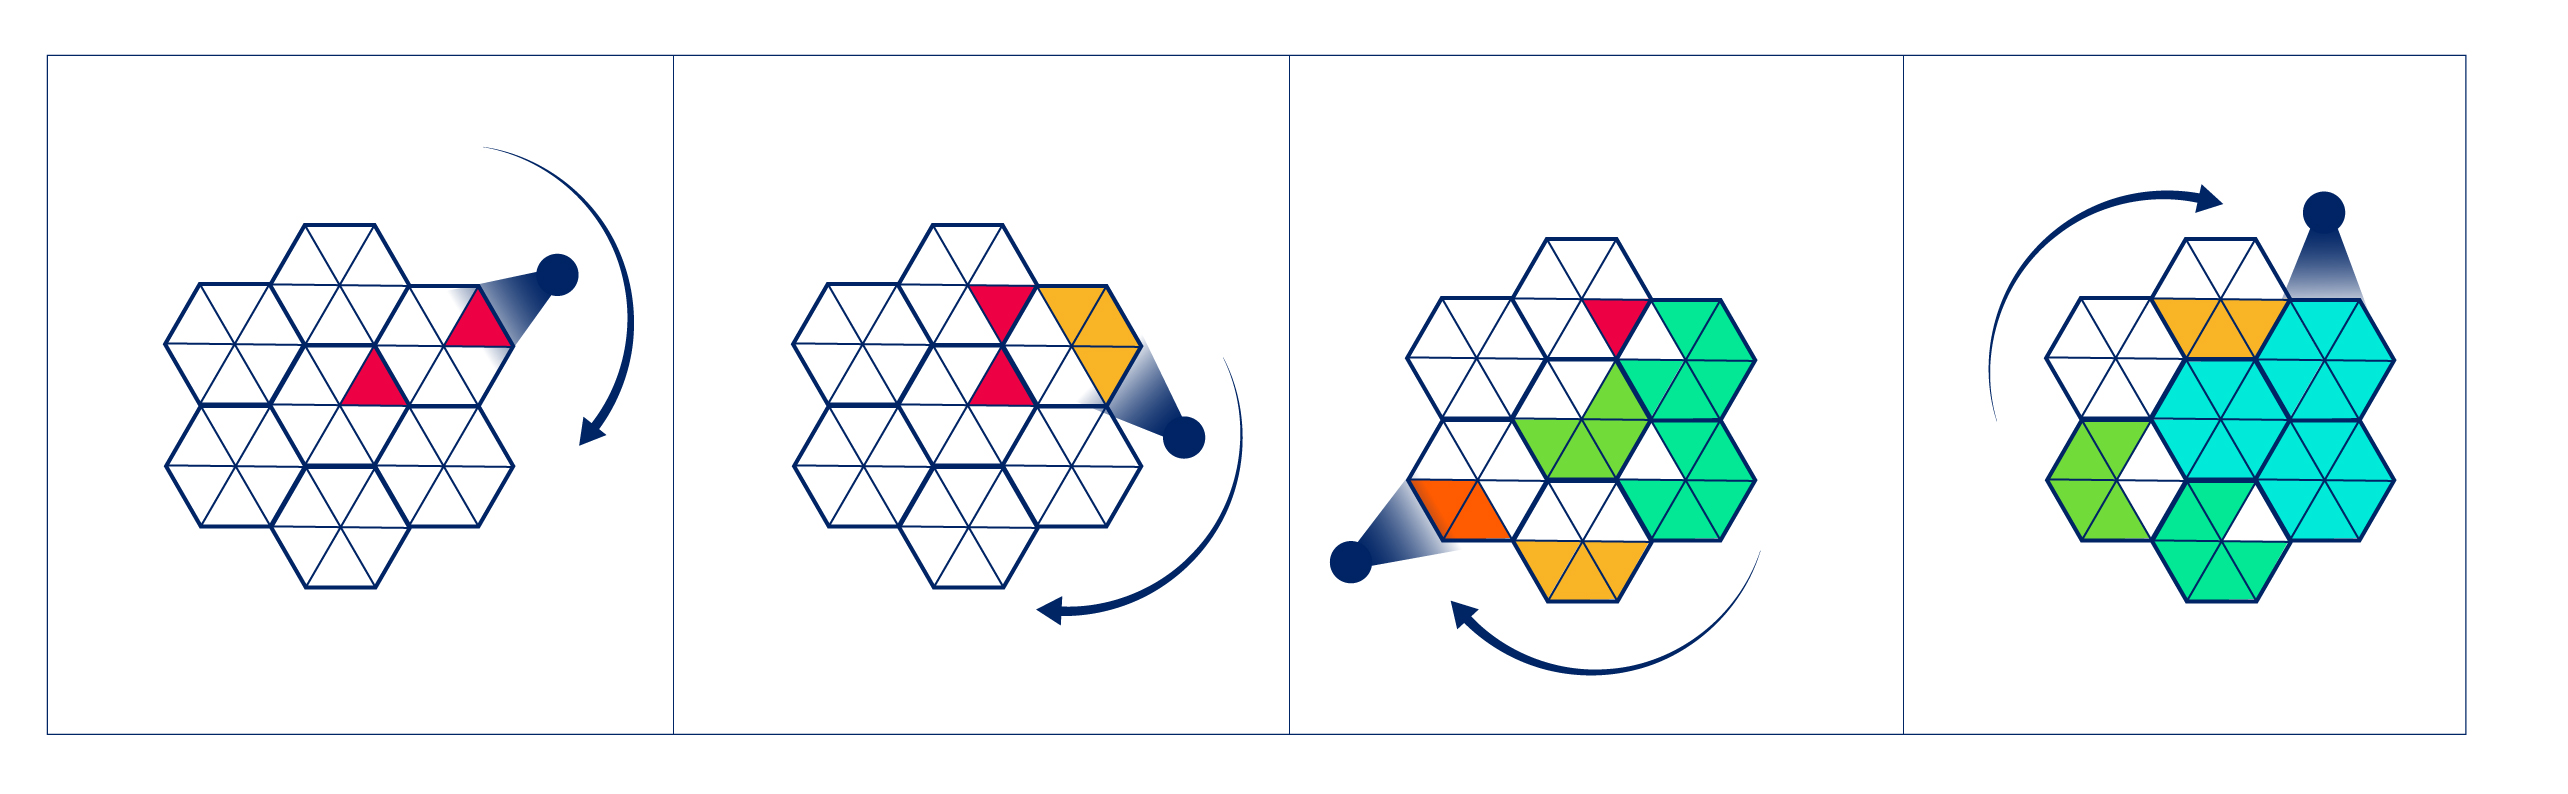
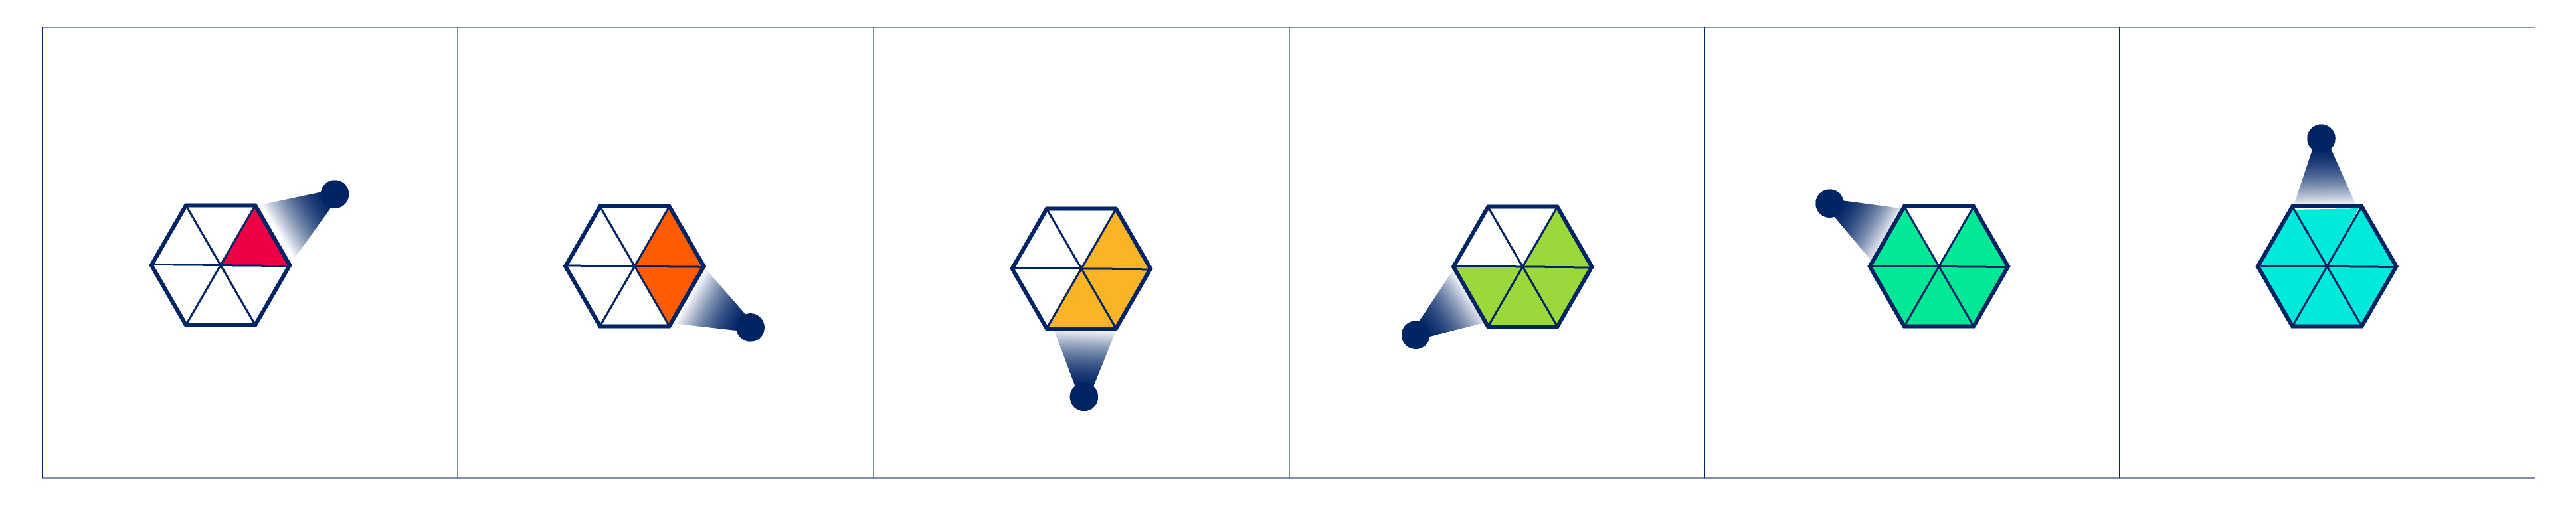
The OVER Mapper has a color system to enable you to see how much of the location you have captured. Slices within the hexagon will turn solid, transitioning from red to orange to green, to indicate complete capture of the hexagon. You make the hexagons solid by moving around each one with your camera pointed towards the center, as shown below.
While the hexagonal guide on the floor/ground will give you a general reference as to the captured section of the location, it cannot take into account the specifics of the area you’re mapping, such as features or objects. Therefore, try to capture the feature or object from multiple points of view.
The minimum number of images to be captured for an OVER Map to be valid and approved—and for eligibility in the map2earn™️ rewards program—is 300. You can capture up to 1000 photos for each map.
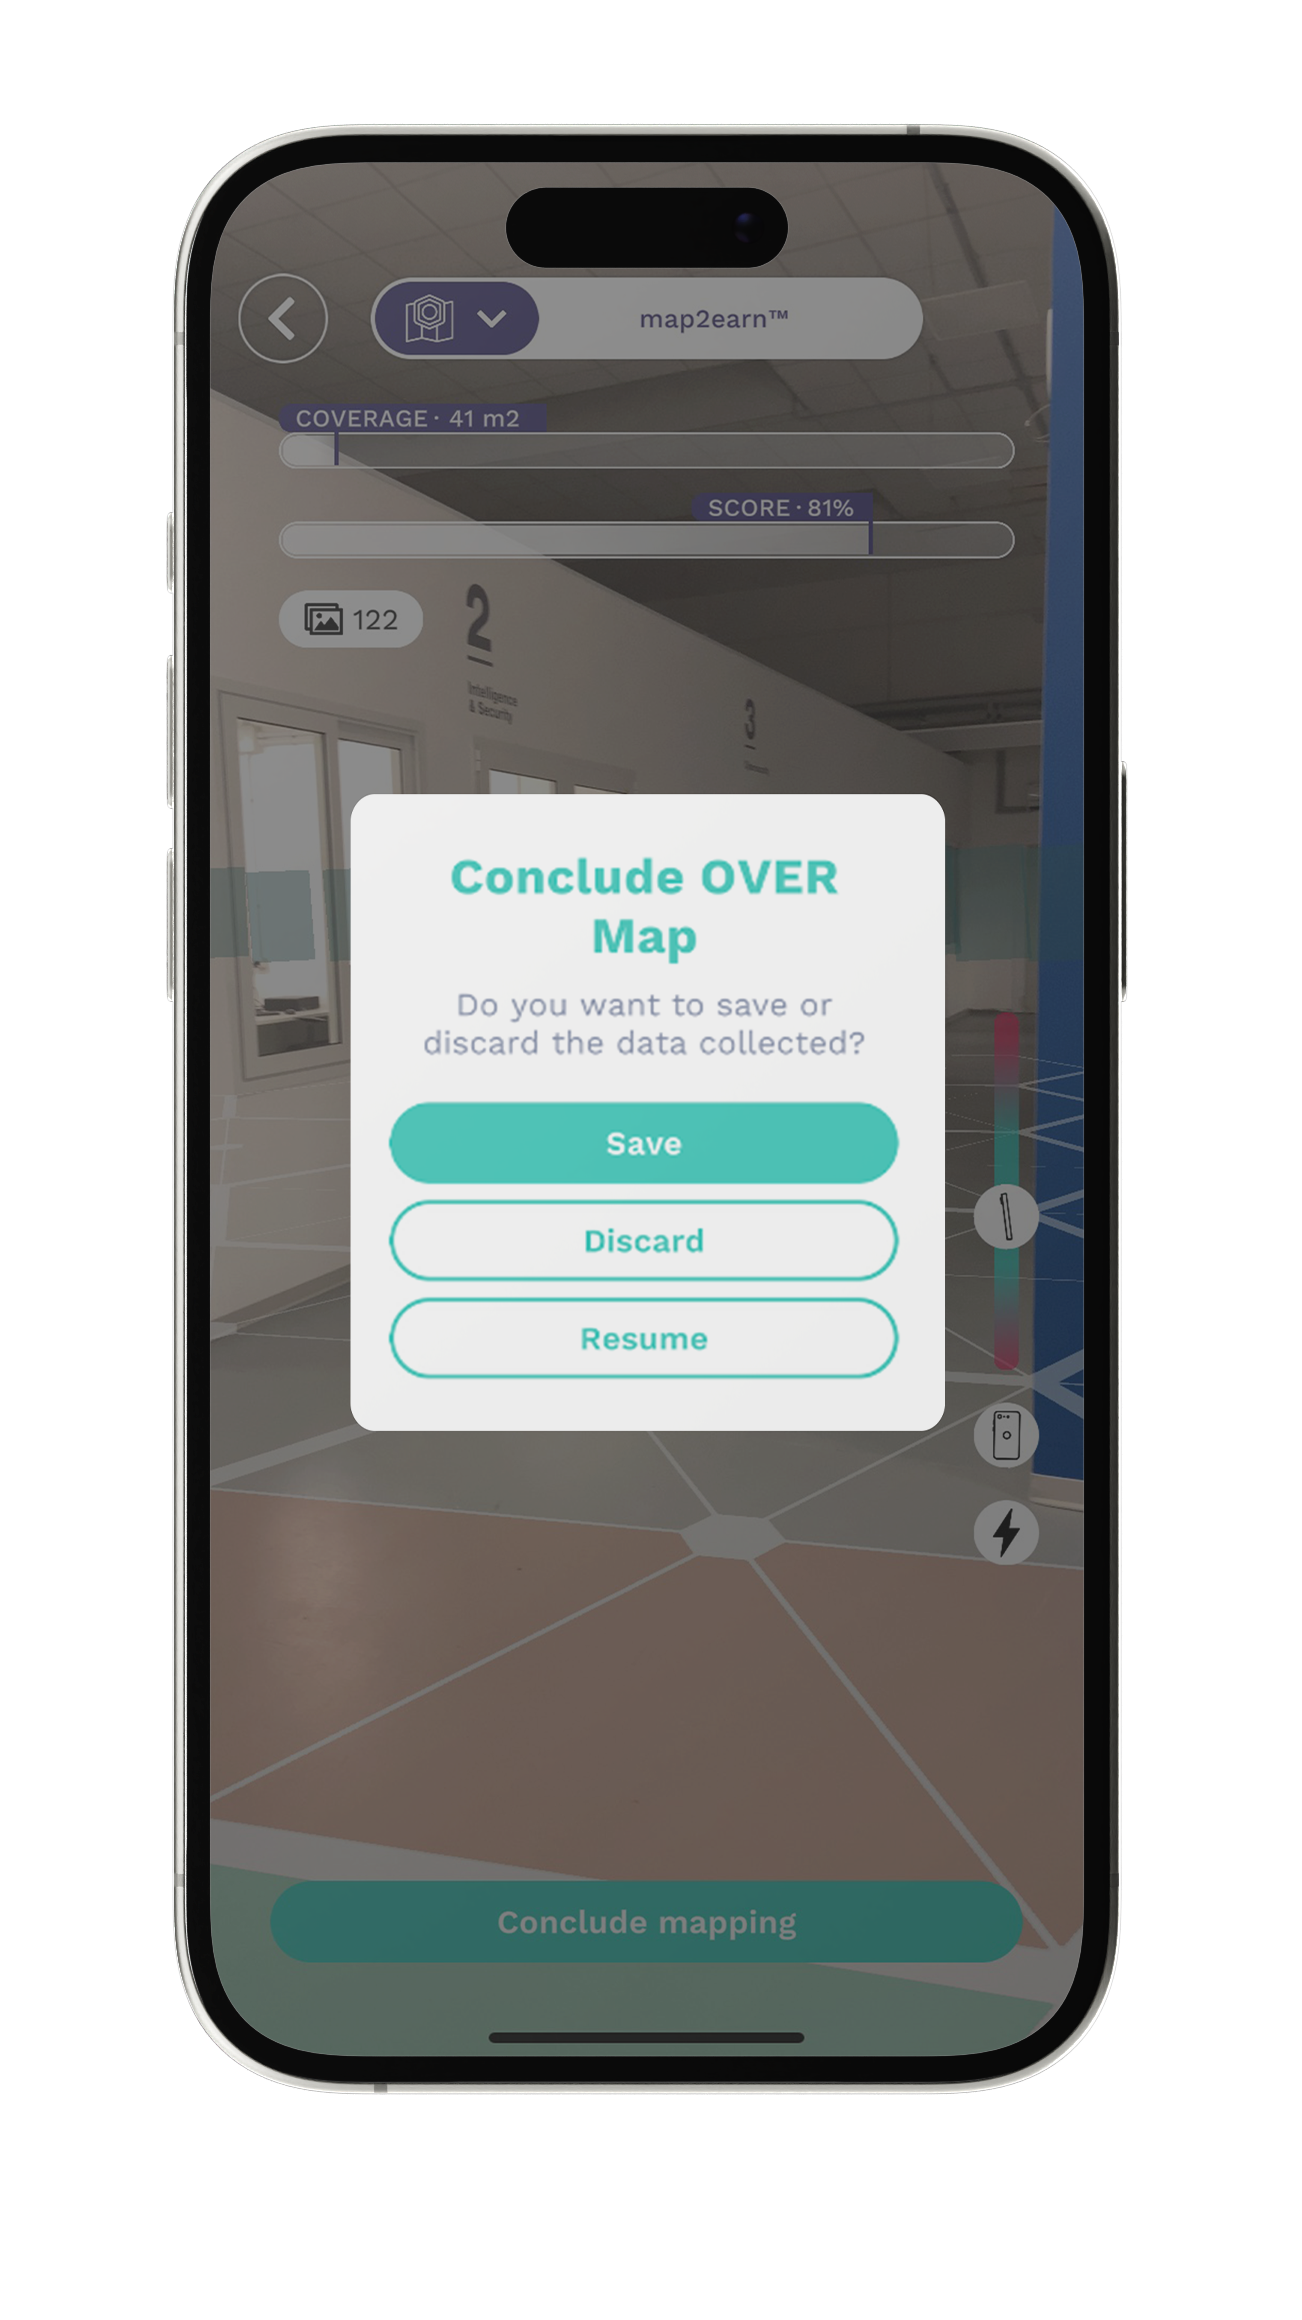
When you’re satisfied you have completed your map—having filled the hexagons and generated high coverage and score—click the ‘Conclude Mapping’ button and then ‘Save’.
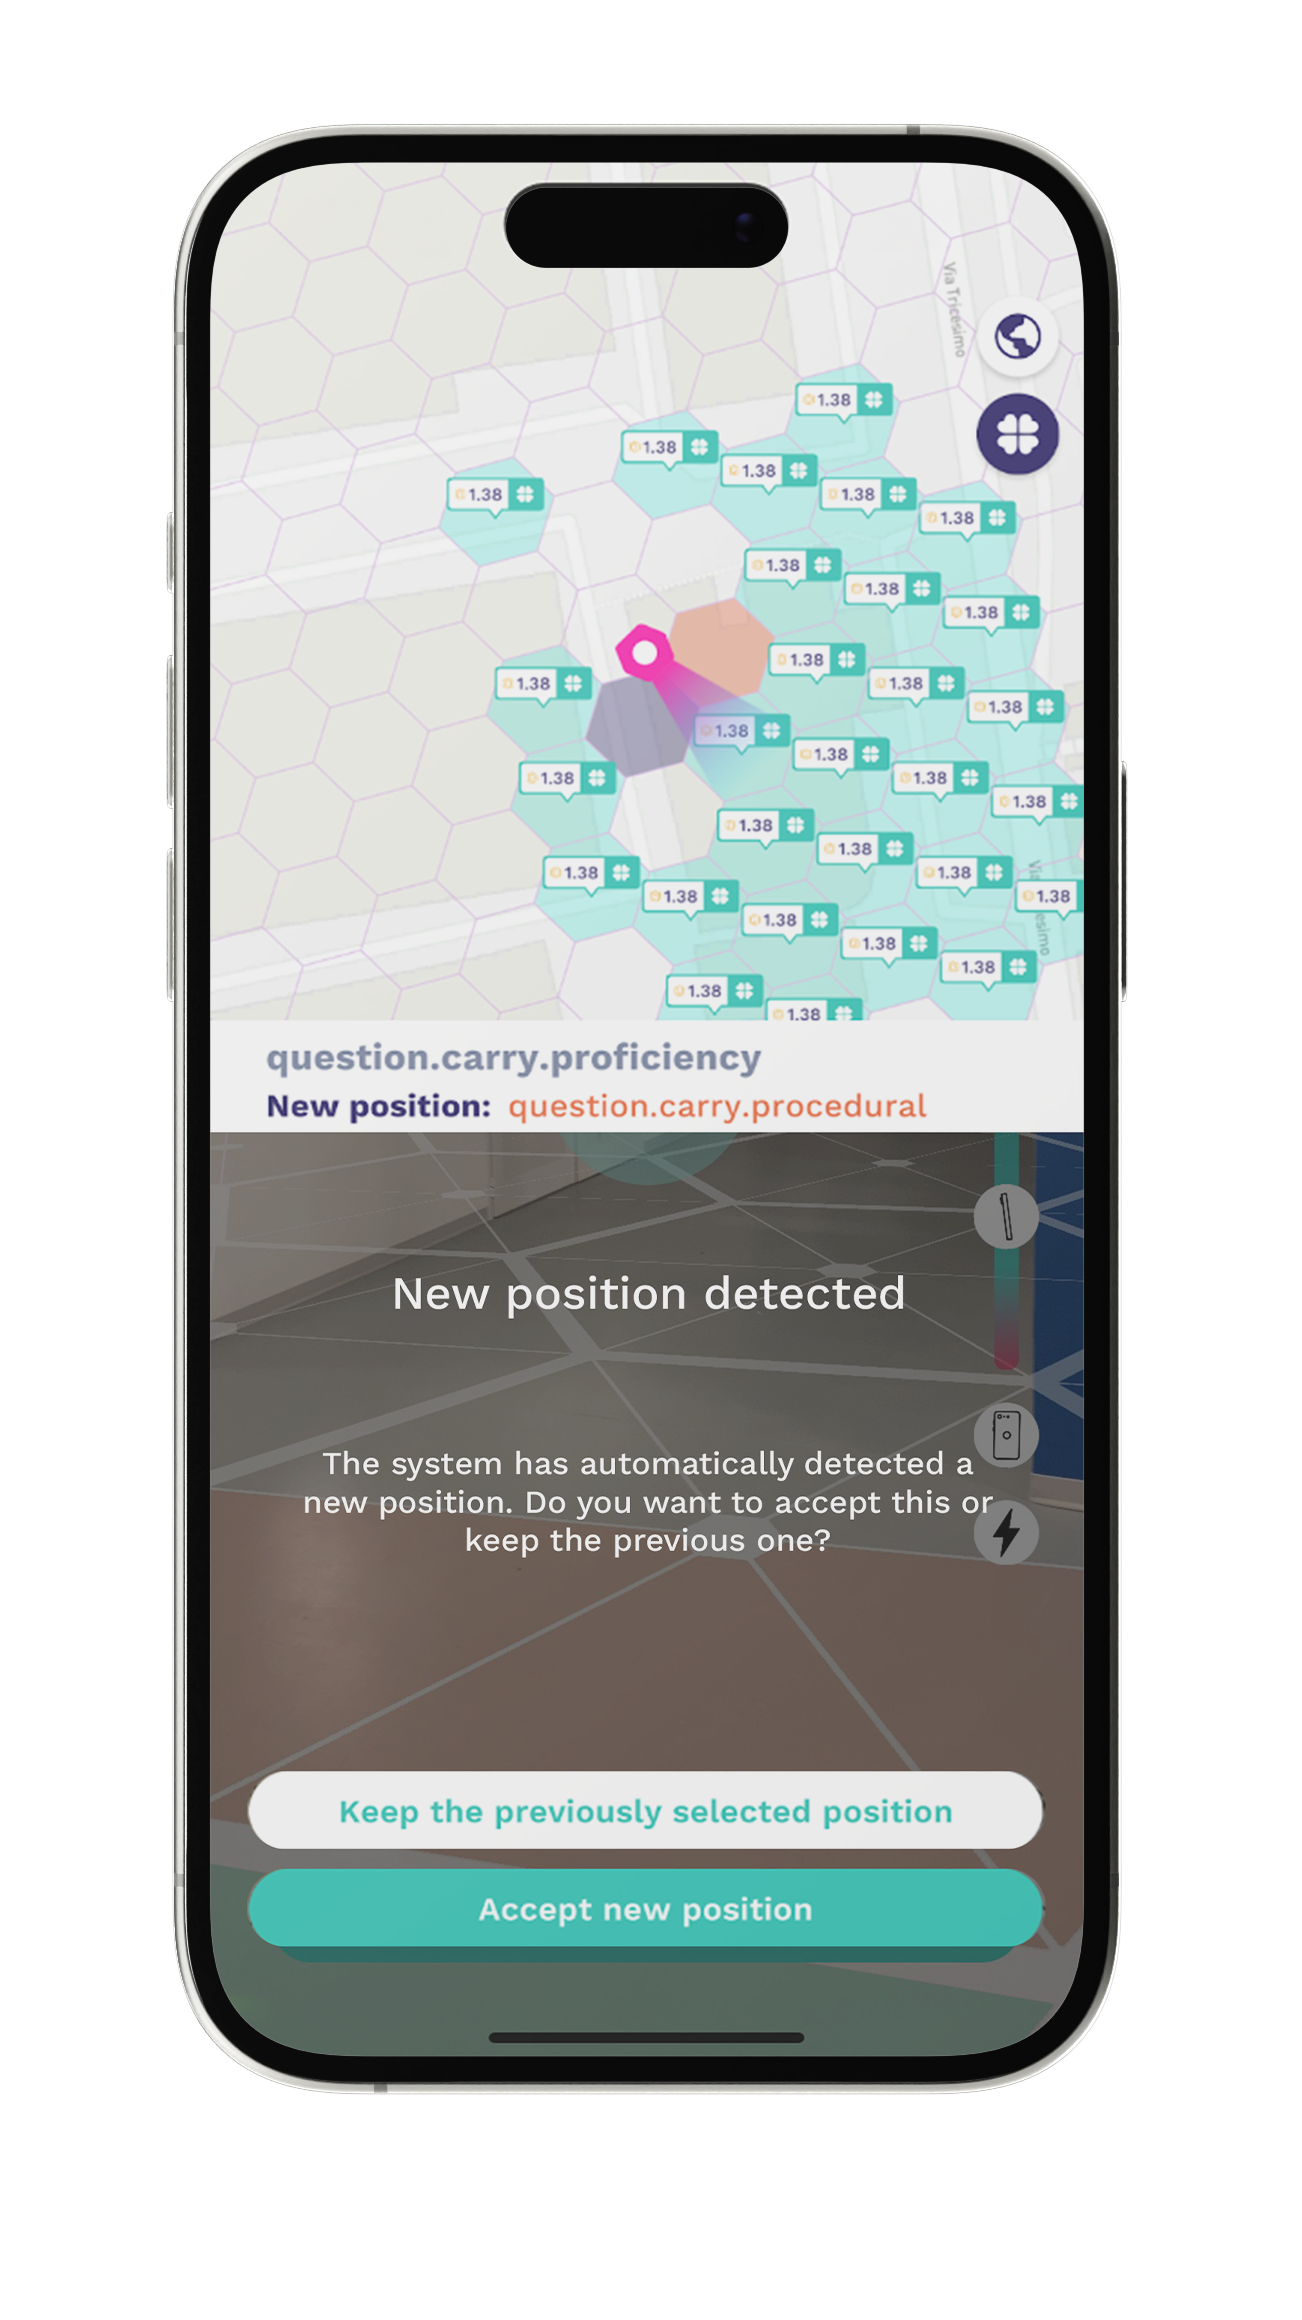
While mapping the system will keep refining the GPS position, if it re-locates you in a different OVER Land you’ll be prompted to accept the new position or keep the previously selected location.
Once you make your selection you can then upload your map.

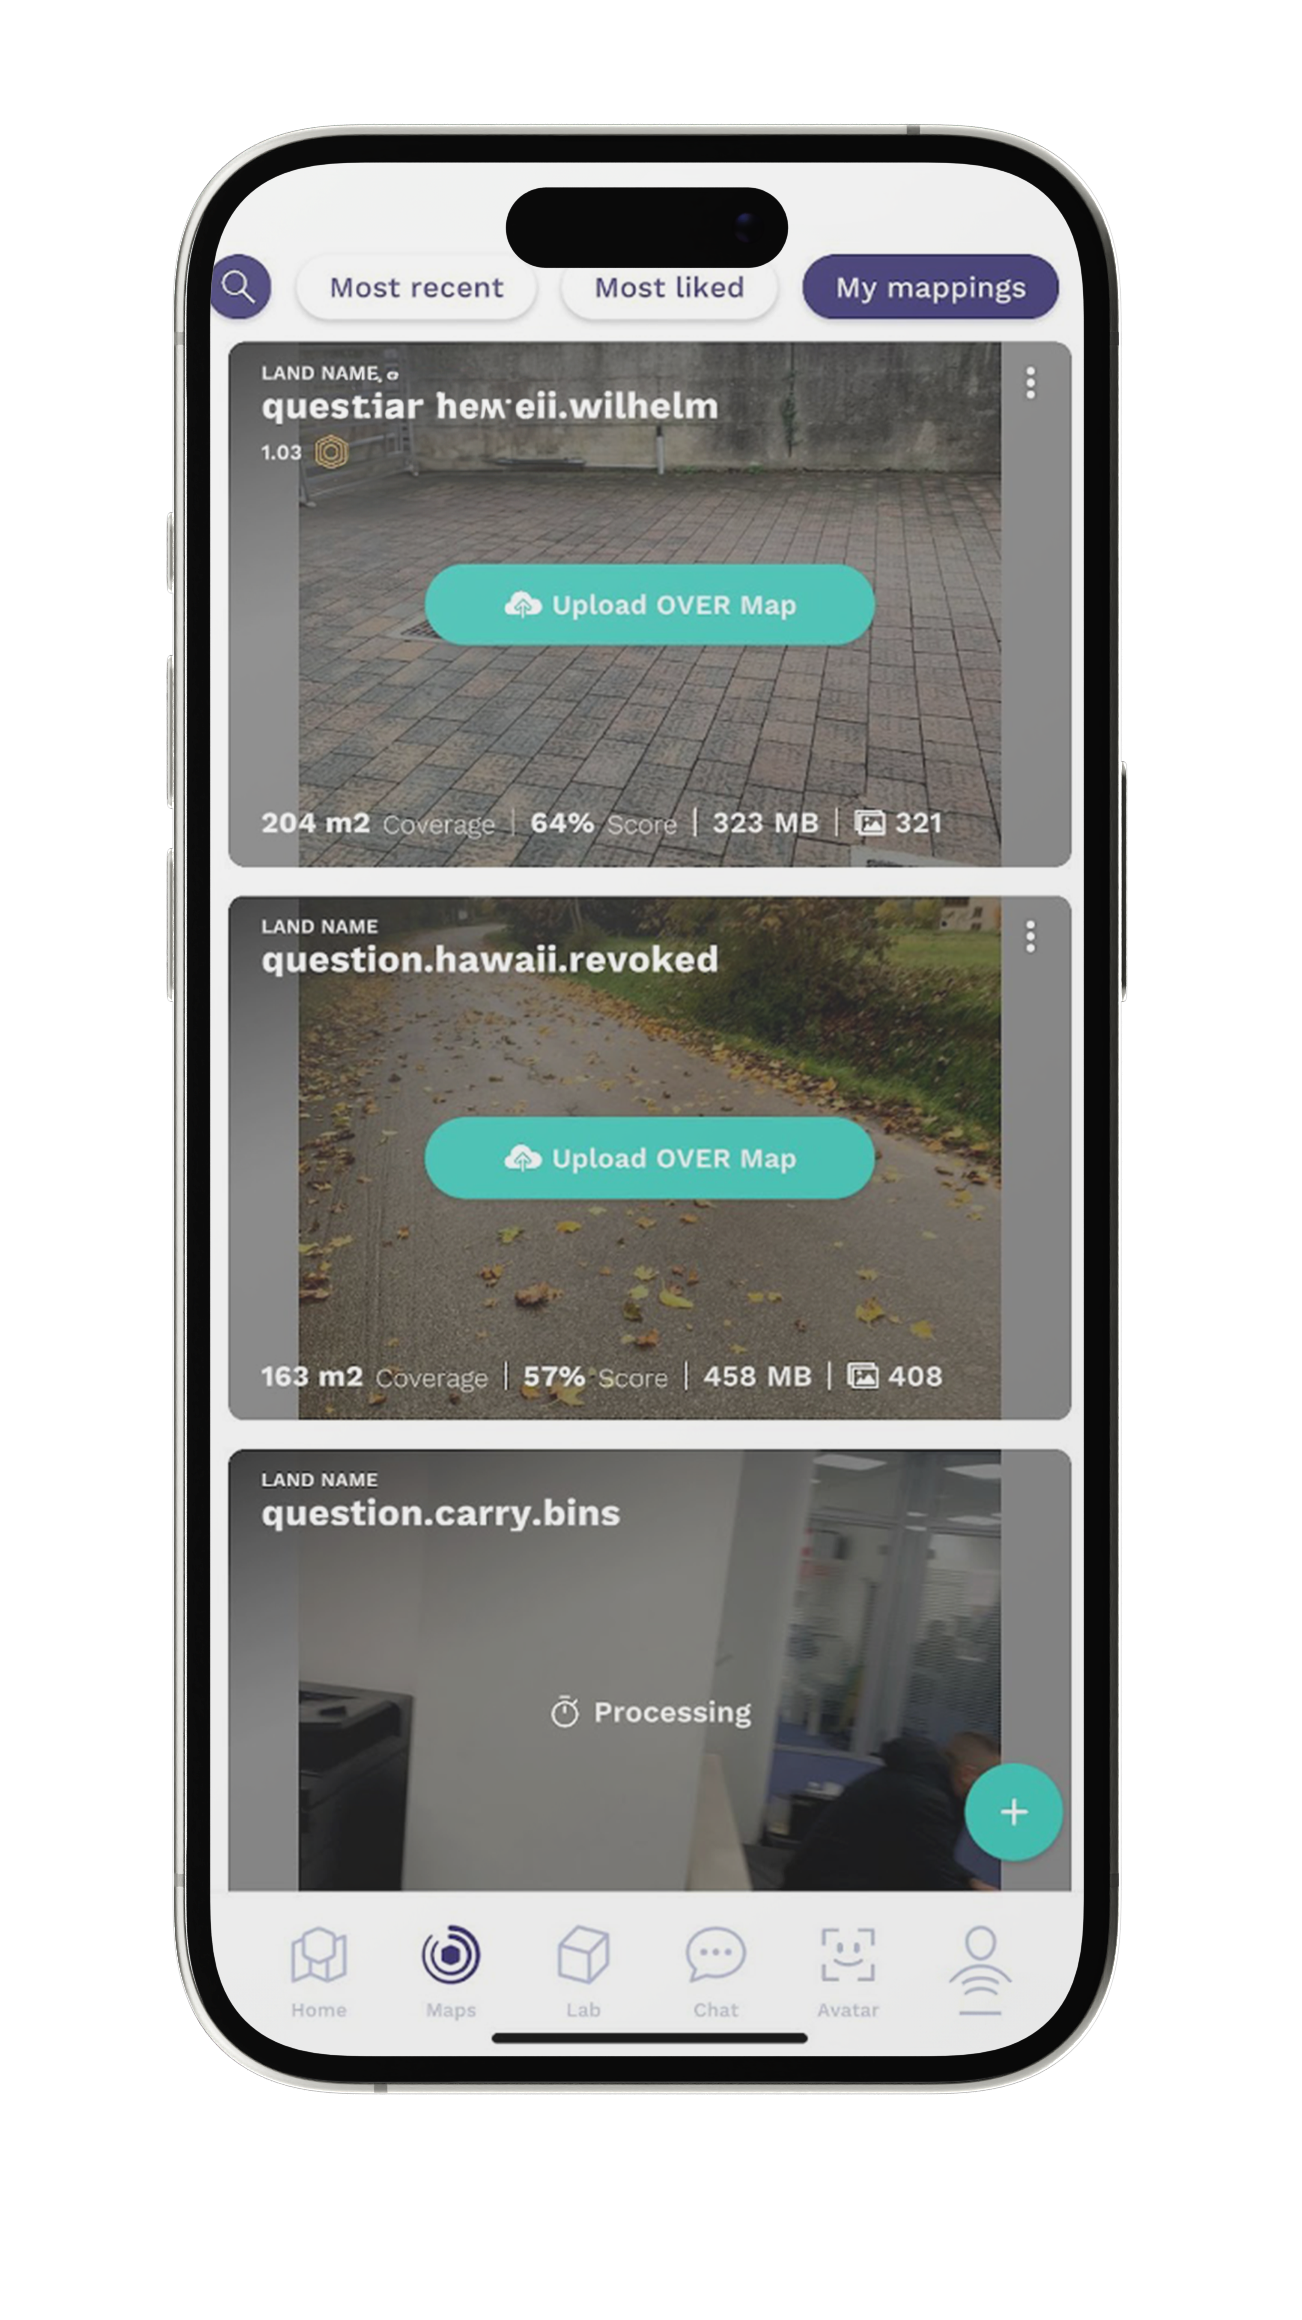
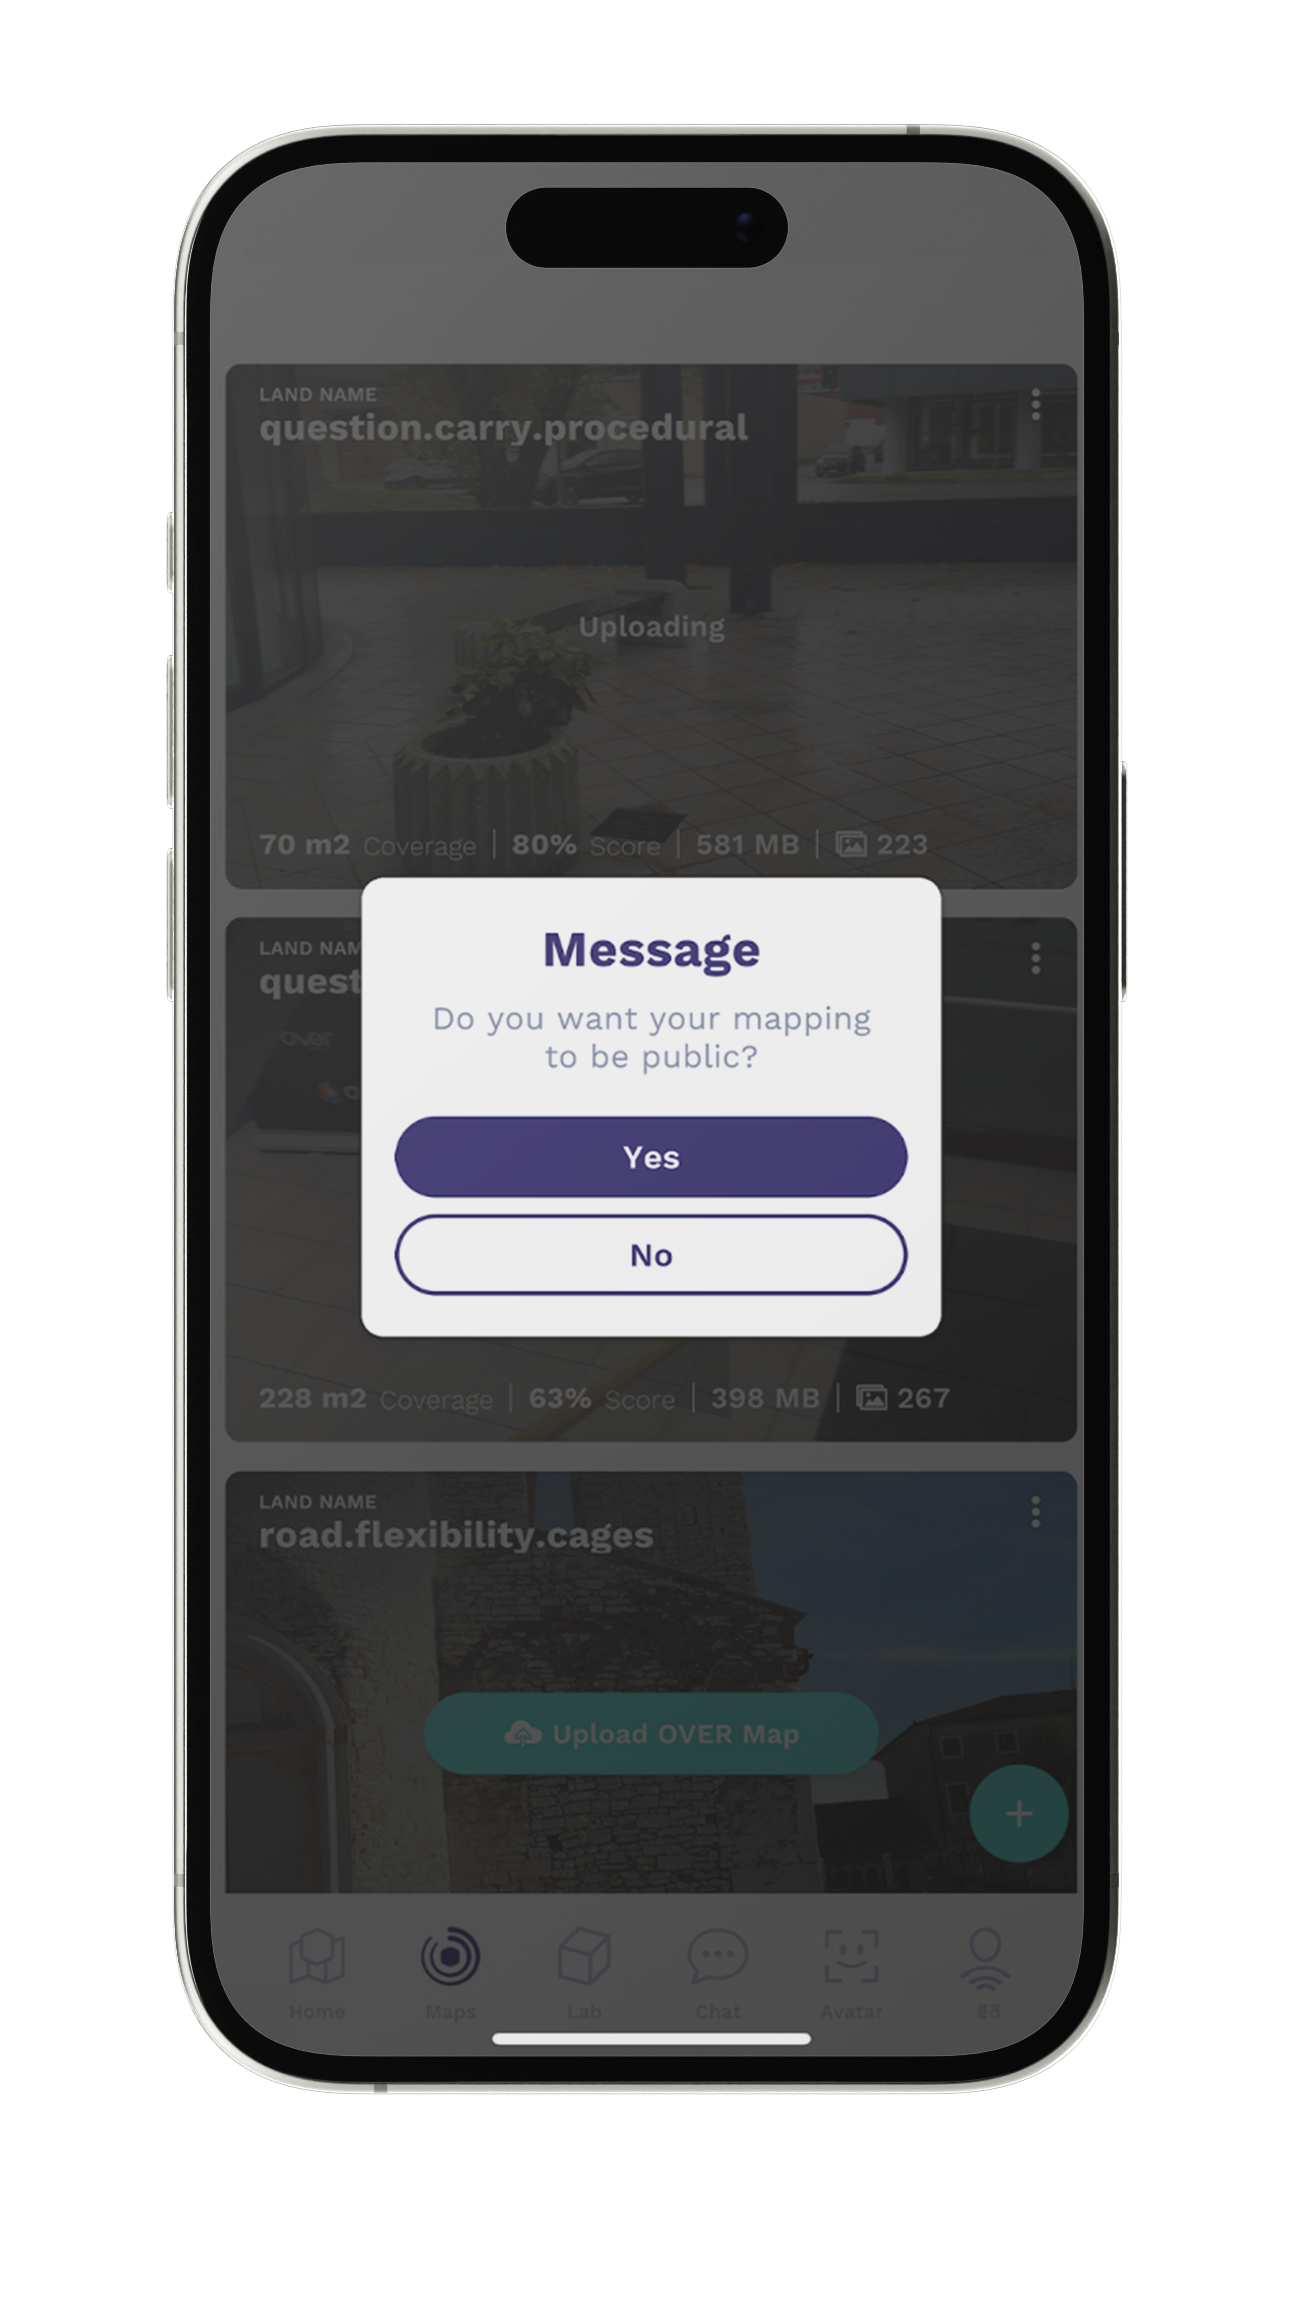
NOTE: If you’re participating in the map2earn™ rewards program, and your map has been approved, ownership of your map will automatically be transferred to OVER. If you want to maintain ownership of your OVER Map, toggle the icon on the map thumbnail before uploading:
Once the upload is completed you’ll be asked if you want to make your OVER Map publicly visible. If you keep it private, only you will be able to see the content of the OVER Map. The map must be public in order to be eligible for the map2earn™ rewards program.
Top mapping tips
Capture speed
Motion blur, caused by moving too quickly when mapping a location, can significantly degrade the quality of an OVER Map.
For best results, move slowly while holding your device and try to avoid rapid movements. Rotating on your vertical axis creates high angular velocity (high probability of motion blur) and, in general, does not produce very useful data for the creation of OVER Maps.
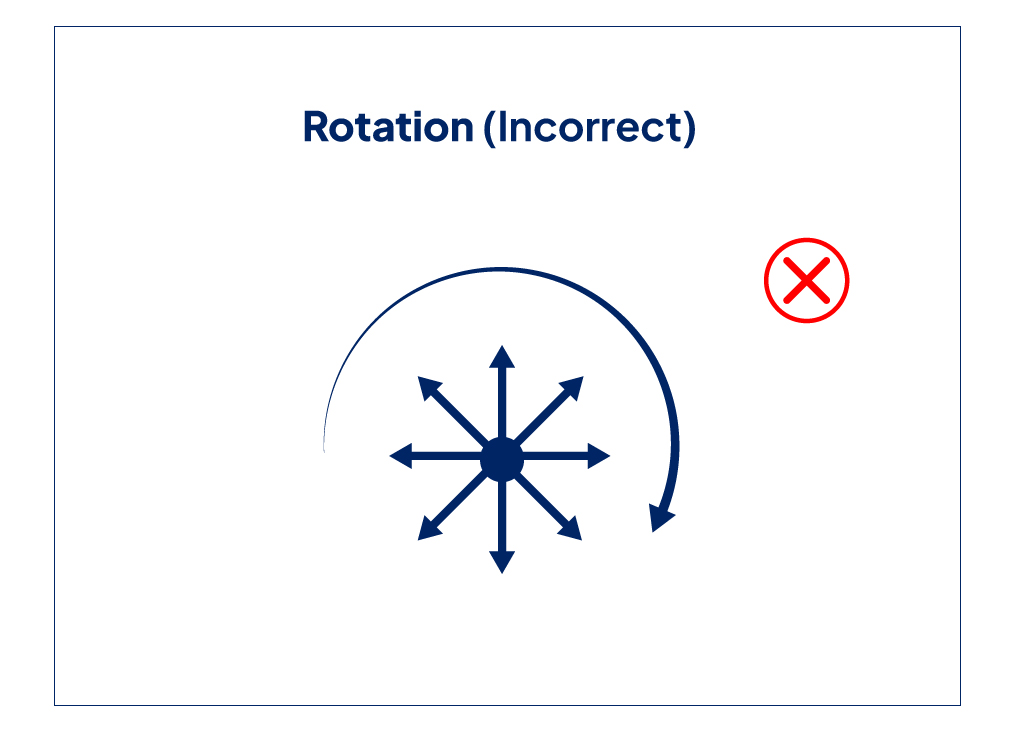
DIAGRAM: In this example, the mapper (indicated by the blue dot) is standing in one position and turning around. The best practice would be to move around while holding the device rather than stand in a single spot.
Low light conditions will exacerbate the motion blur since the smartphone camera will need longer exposition times.
Scene coverage
For best results, the location you’re mapping should be captured from as many unique viewpoints as possible.
To begin, it’s important to get a panoramic capture—walking the border of the area you are mapping with the camera pointed toward the center of the area. Once the panoramic capture is completed, you should capture other points of view. This is because the location you’re mapping will have objects in it, such as trees and structures, which naturally block a view of what’s on the other side.
In general, it is better to move the phone around (in 3D space) rather than rotating it from a stationary position when capturing the area.
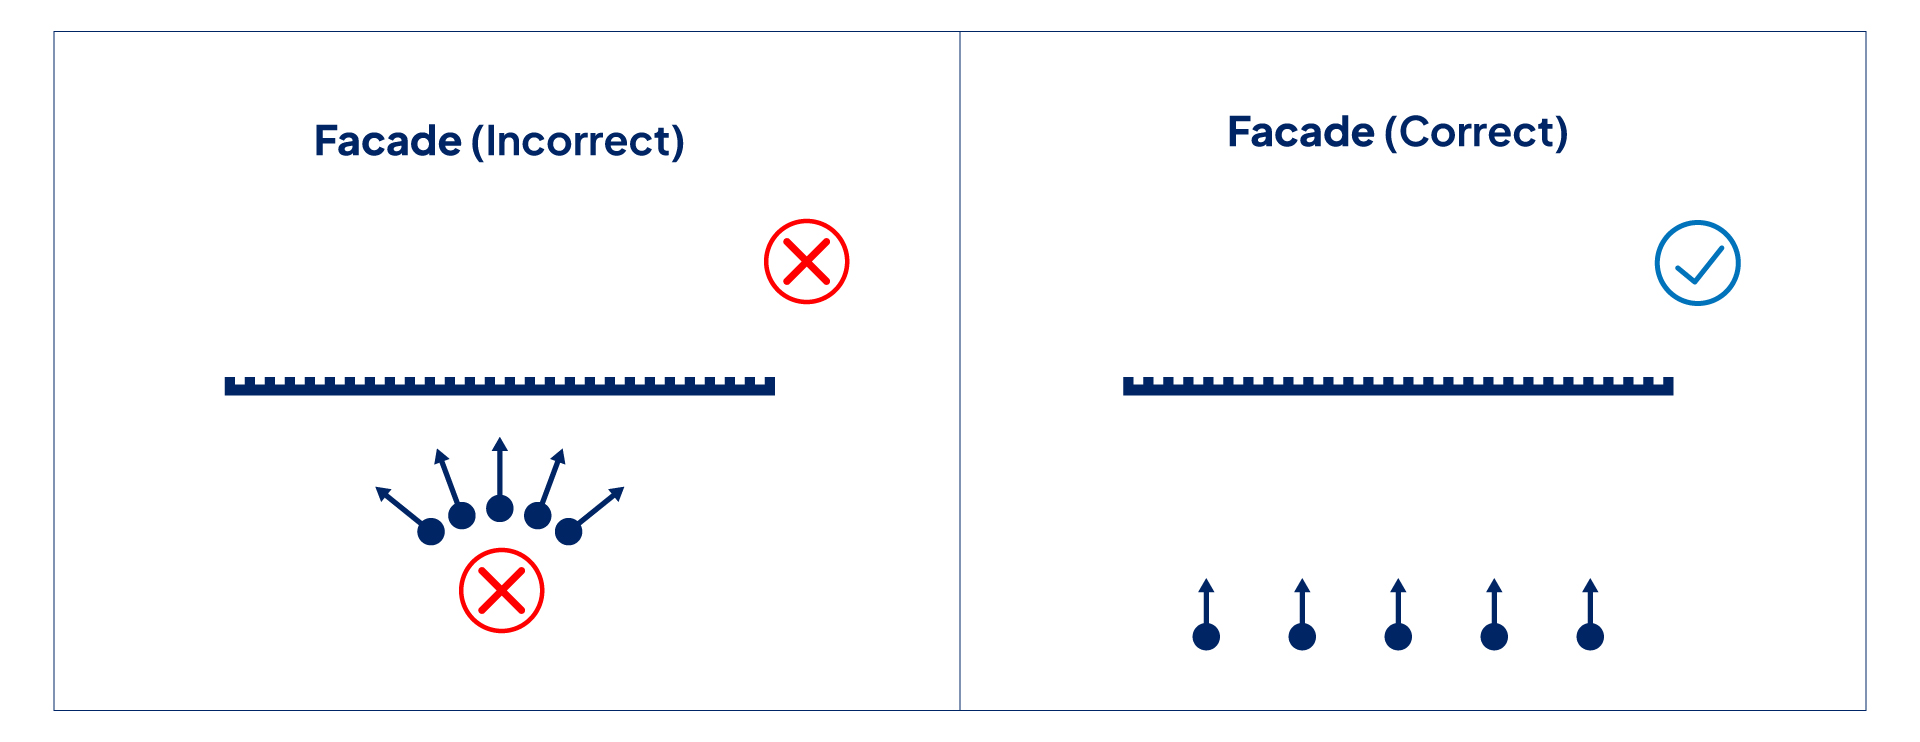
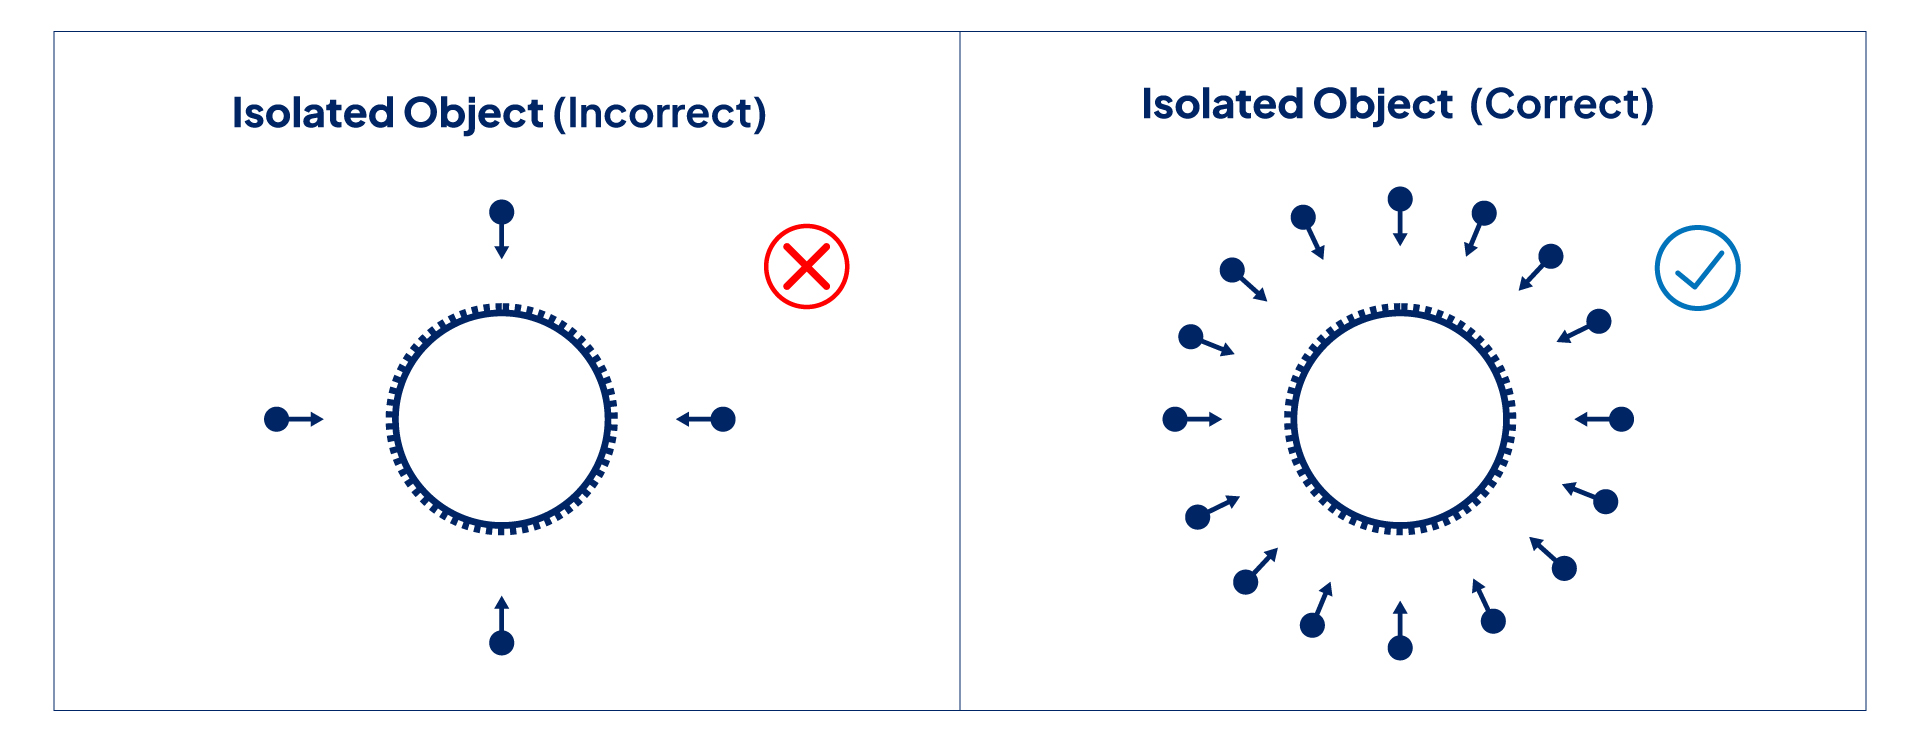
DIAGRAM: Standing in the same place and capturing in a semi-circle motion does not work well, both indoors and outdoors.
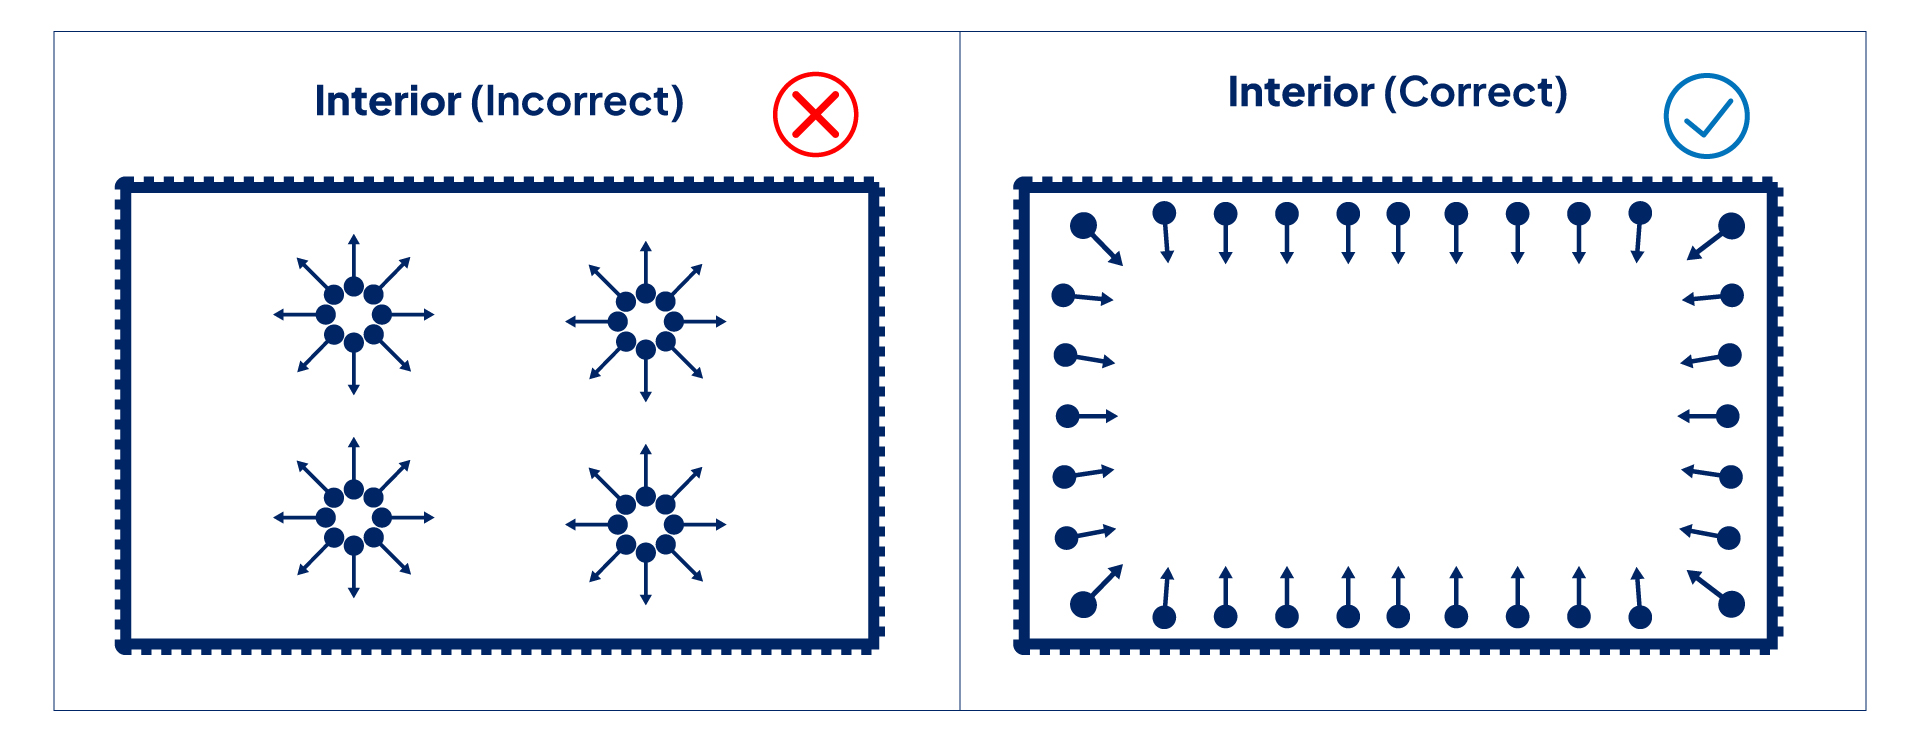
DIAGRAM: Map an interior location from the outside in, moving around the boundary of the room.
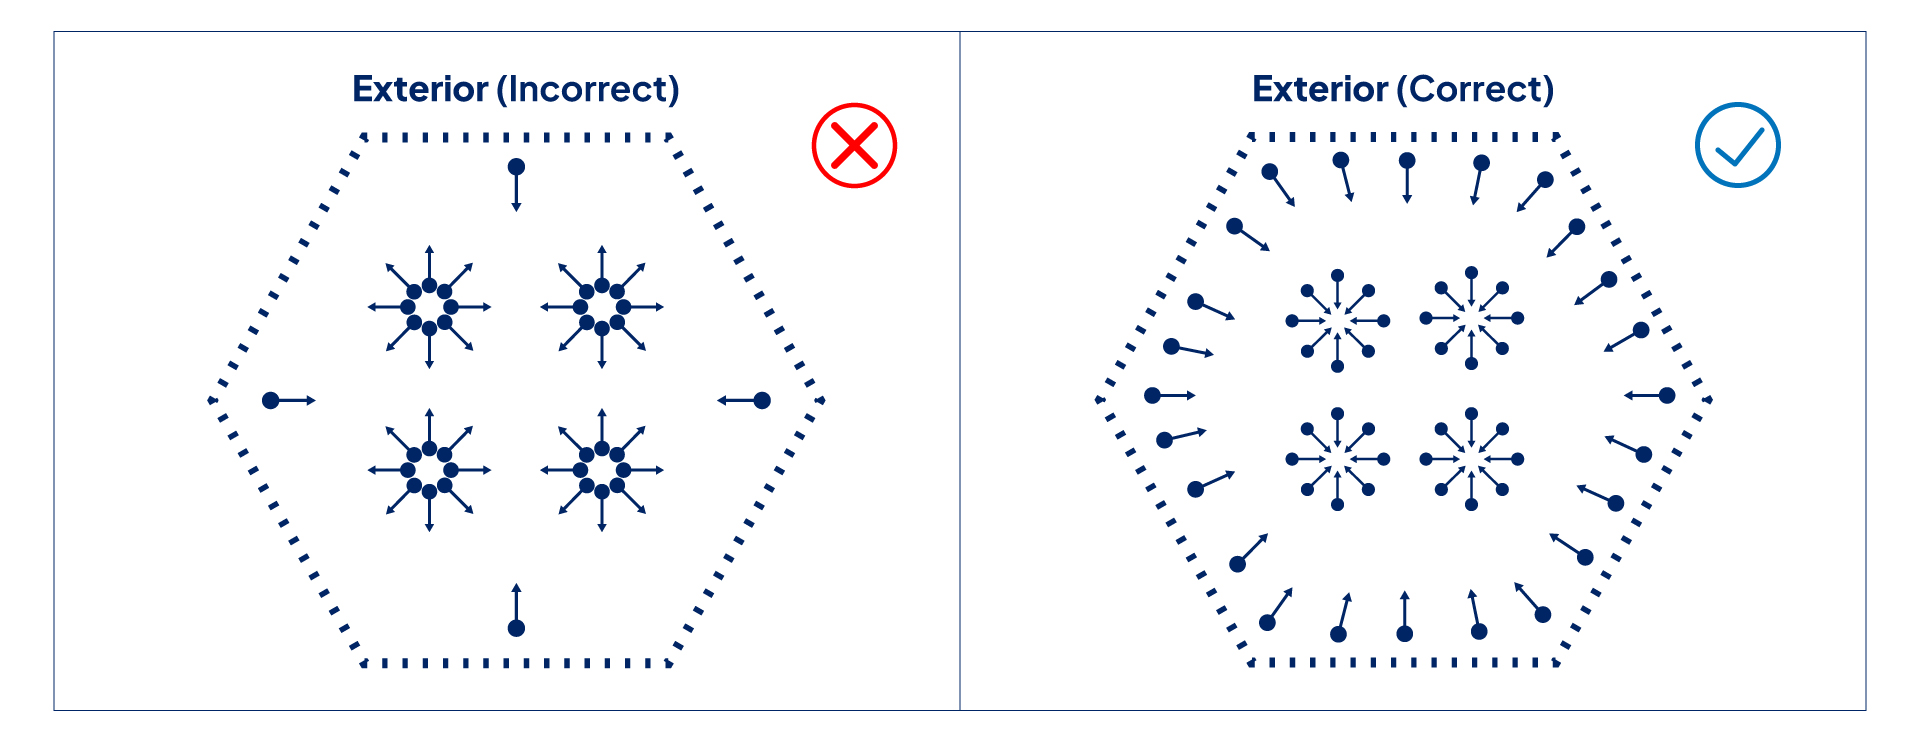
DIAGRAM: When outside, don’t stand in a single spot and rotate. First, move around the border of the area, pointing your device’s camera inwards. Then do the same with each object.
Providing multiple points of view when capturing objects in a location, ensures a better outcome.

Object surfaces
Currently, the OVER Mapper struggles with complex reflections (e.g. curved mirror-like surfaces), curved transparent objects (e.g. car windows or plastic water bottles), and very large textureless surfaces (e.g. white walls). Most other object surfaces are fine.
Moving objects
Any movement in an area being mapped may degrade the quality of the final result. For example, tree leaves blown around by the wind may lessen detail, and people moving around in the background could introduce artifacts to what might otherwise be a pristine capture. If you’re not changing perspective, the device will not capture any image. You can avoid capturing passing people by holding the device still. A slight haptic vibration indicates any captured image. And please be careful not to get fingers, arms or legs into the frame when mapping areas.
…
If you have any further questions, don’t hesitate to drop into the OVER Discord channel, where our community managers and other OVER Mappers can help.
But the best advice is to jump in and start mapping. This is the first initiative of its kind anywhere in the world. We can’t wait to see your maps!